ro-drums-808 user guide
ro-drums-808 runs the 808's own sequencer program: what you know from an 808 applies here, and the procedures below are the owner's manual's. Installing is on the download page; the ROM folder, artwork files, the update check and contact are on Support.
Getting started
The first start
The sequencer program is the mask ROM of the 808's CPU, Roland's copyrighted work, so Lemus doesn't include it. The first time ro-drums-808 starts without it, it asks how to continue.
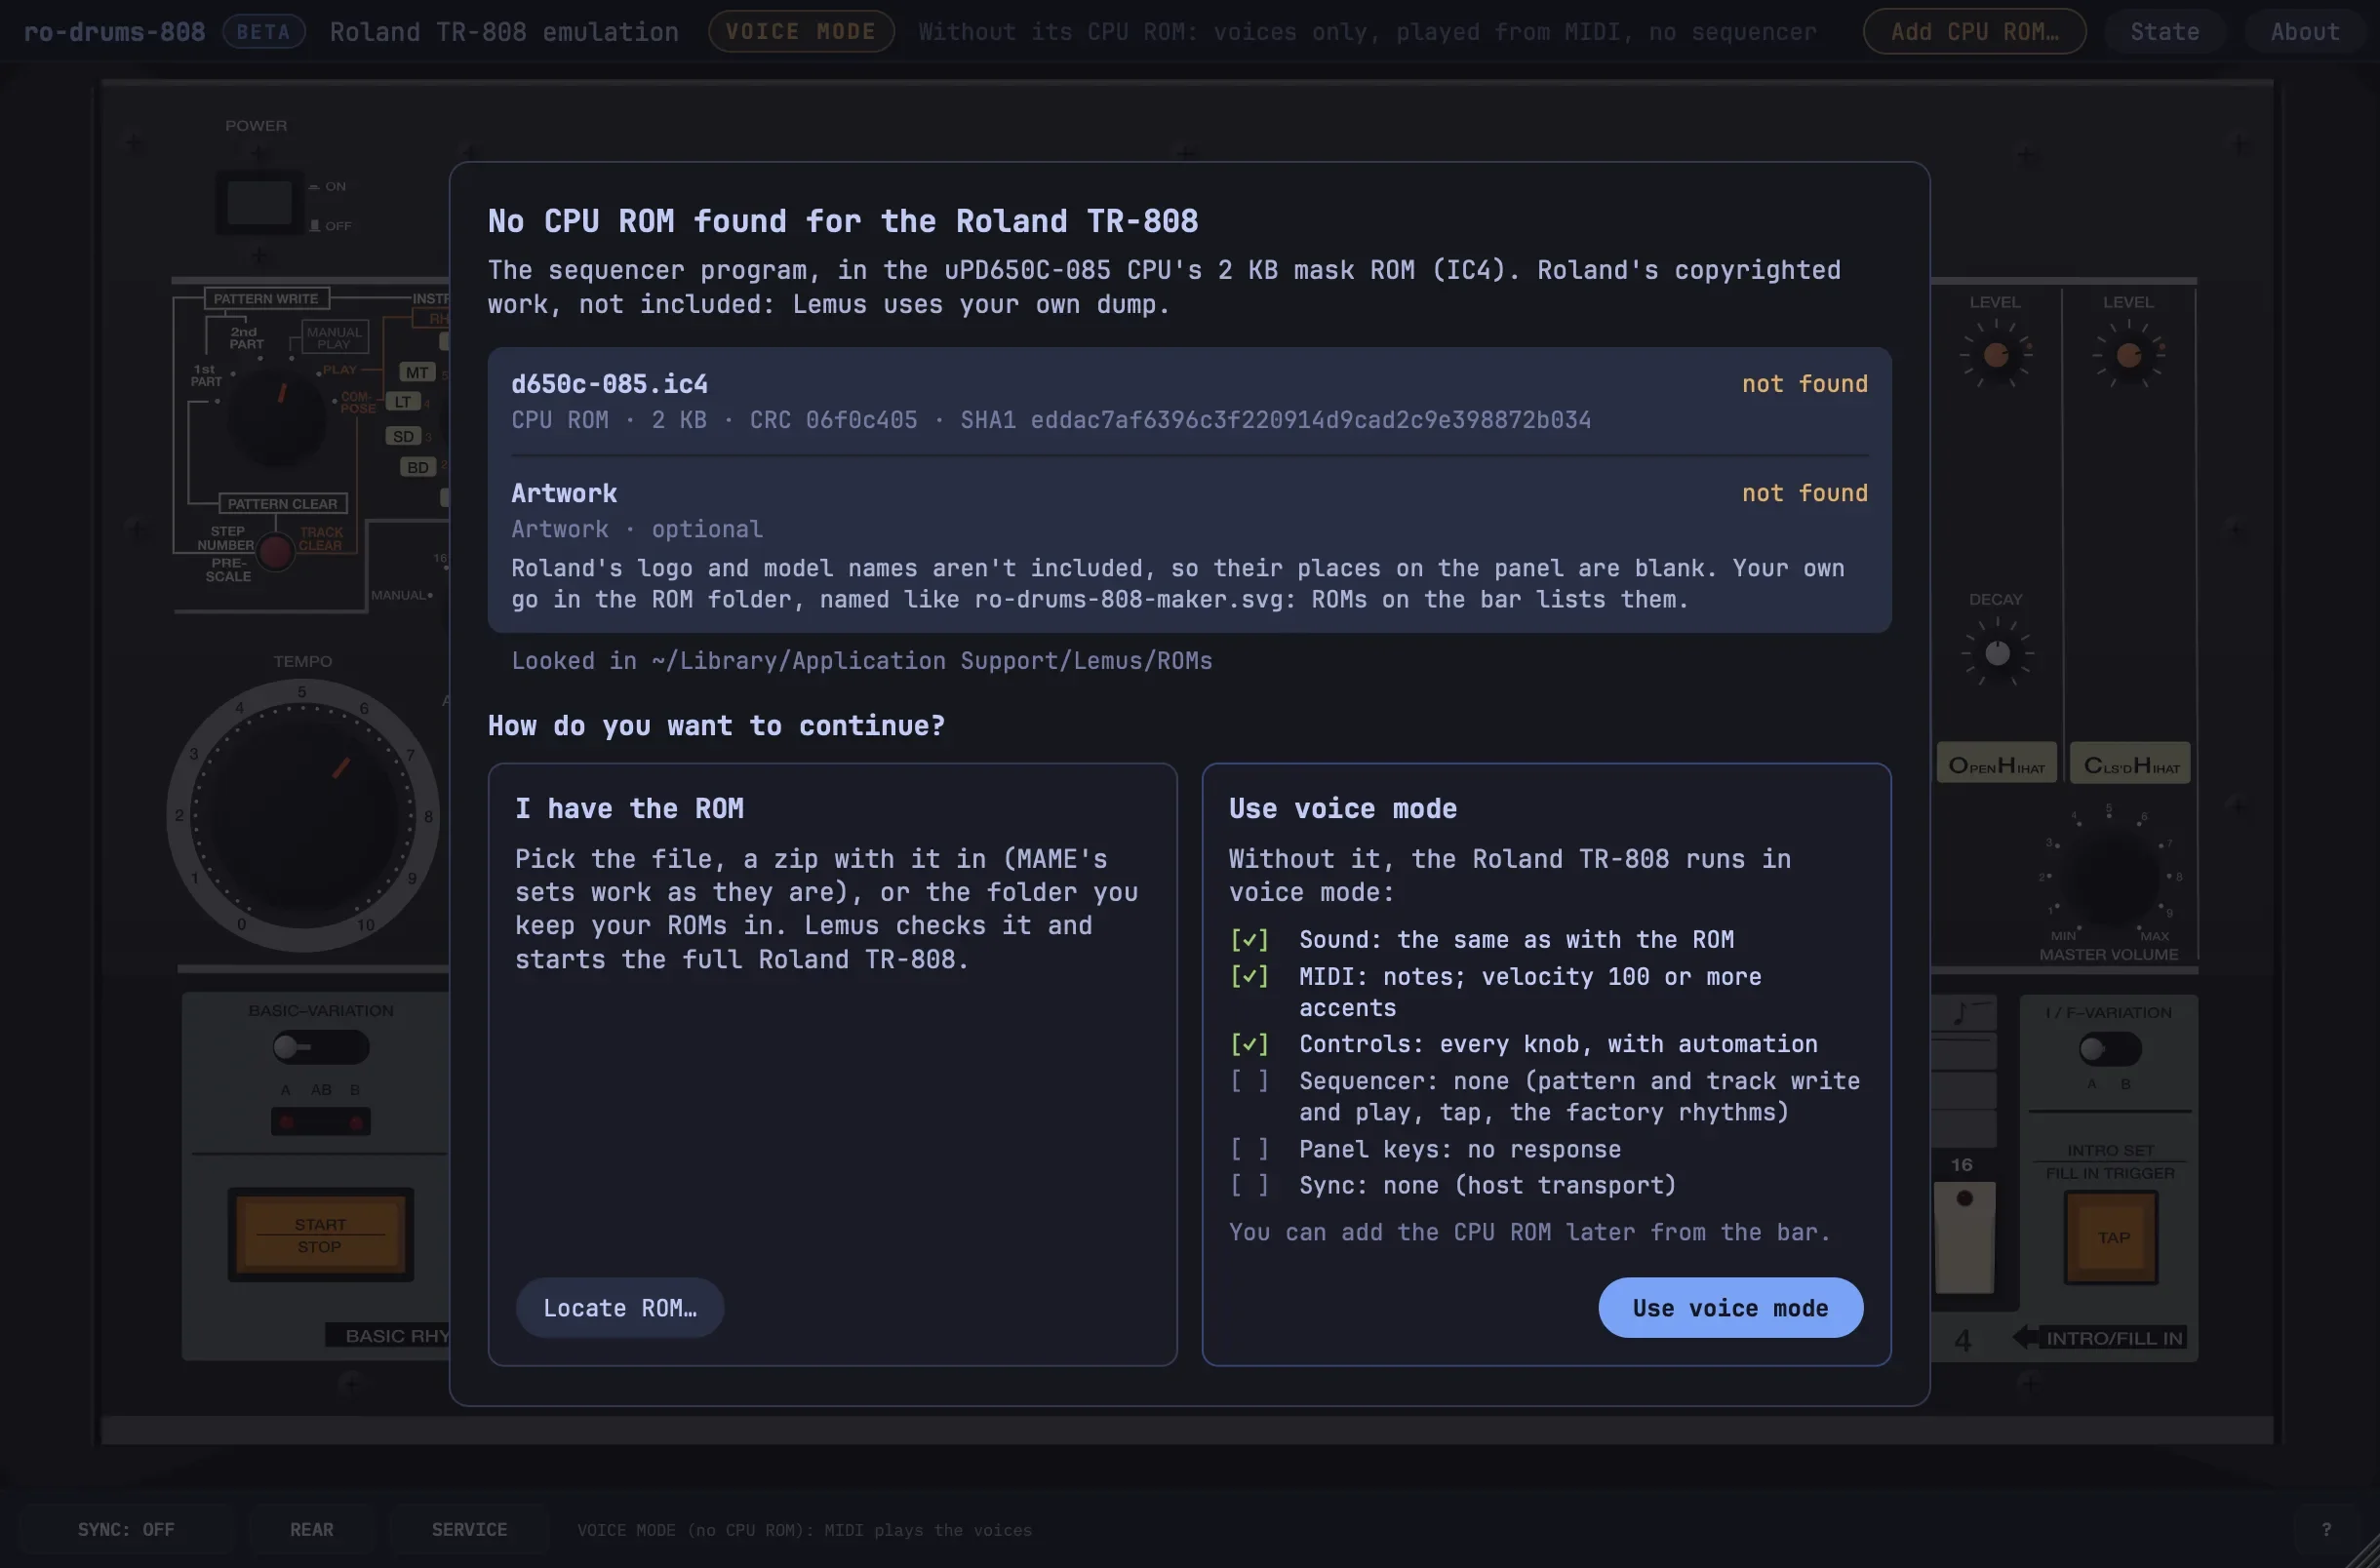
- I have the ROM (Locate ROM…) takes the ROM image, a zip holding it such as MAME's tr808.zip, or a folder. A file is checked and copied into the ROM folder; a folder becomes the ROM folder. The full 808 starts at once, settings kept.
- Use voice mode carries on without it.
The prompt doesn't come back, unless the ROM goes missing after ro-drums-808 has run with it. In voice mode the top bar keeps Add CPU ROM….
The ROM
One optional image, from MAME's tr808 set, found by checksum anywhere in the ROM folder.
| File | What | Without it |
|---|---|---|
| d650c-085.ic4 | The sequencer program: the uPD650C-085 CPU's mask ROM (IC4, 2 KB) | Voice mode |
d650c-085.ic4 · 2,048 bytes · CRC 06f0c405
SHA1 eddac7af6396c3f220914d9cad2c9e398872b034
Voice mode
Without the ROM, ro-drums-808 is the 808's voicing board, played from MIDI: the same sound, without anything the CPU does.
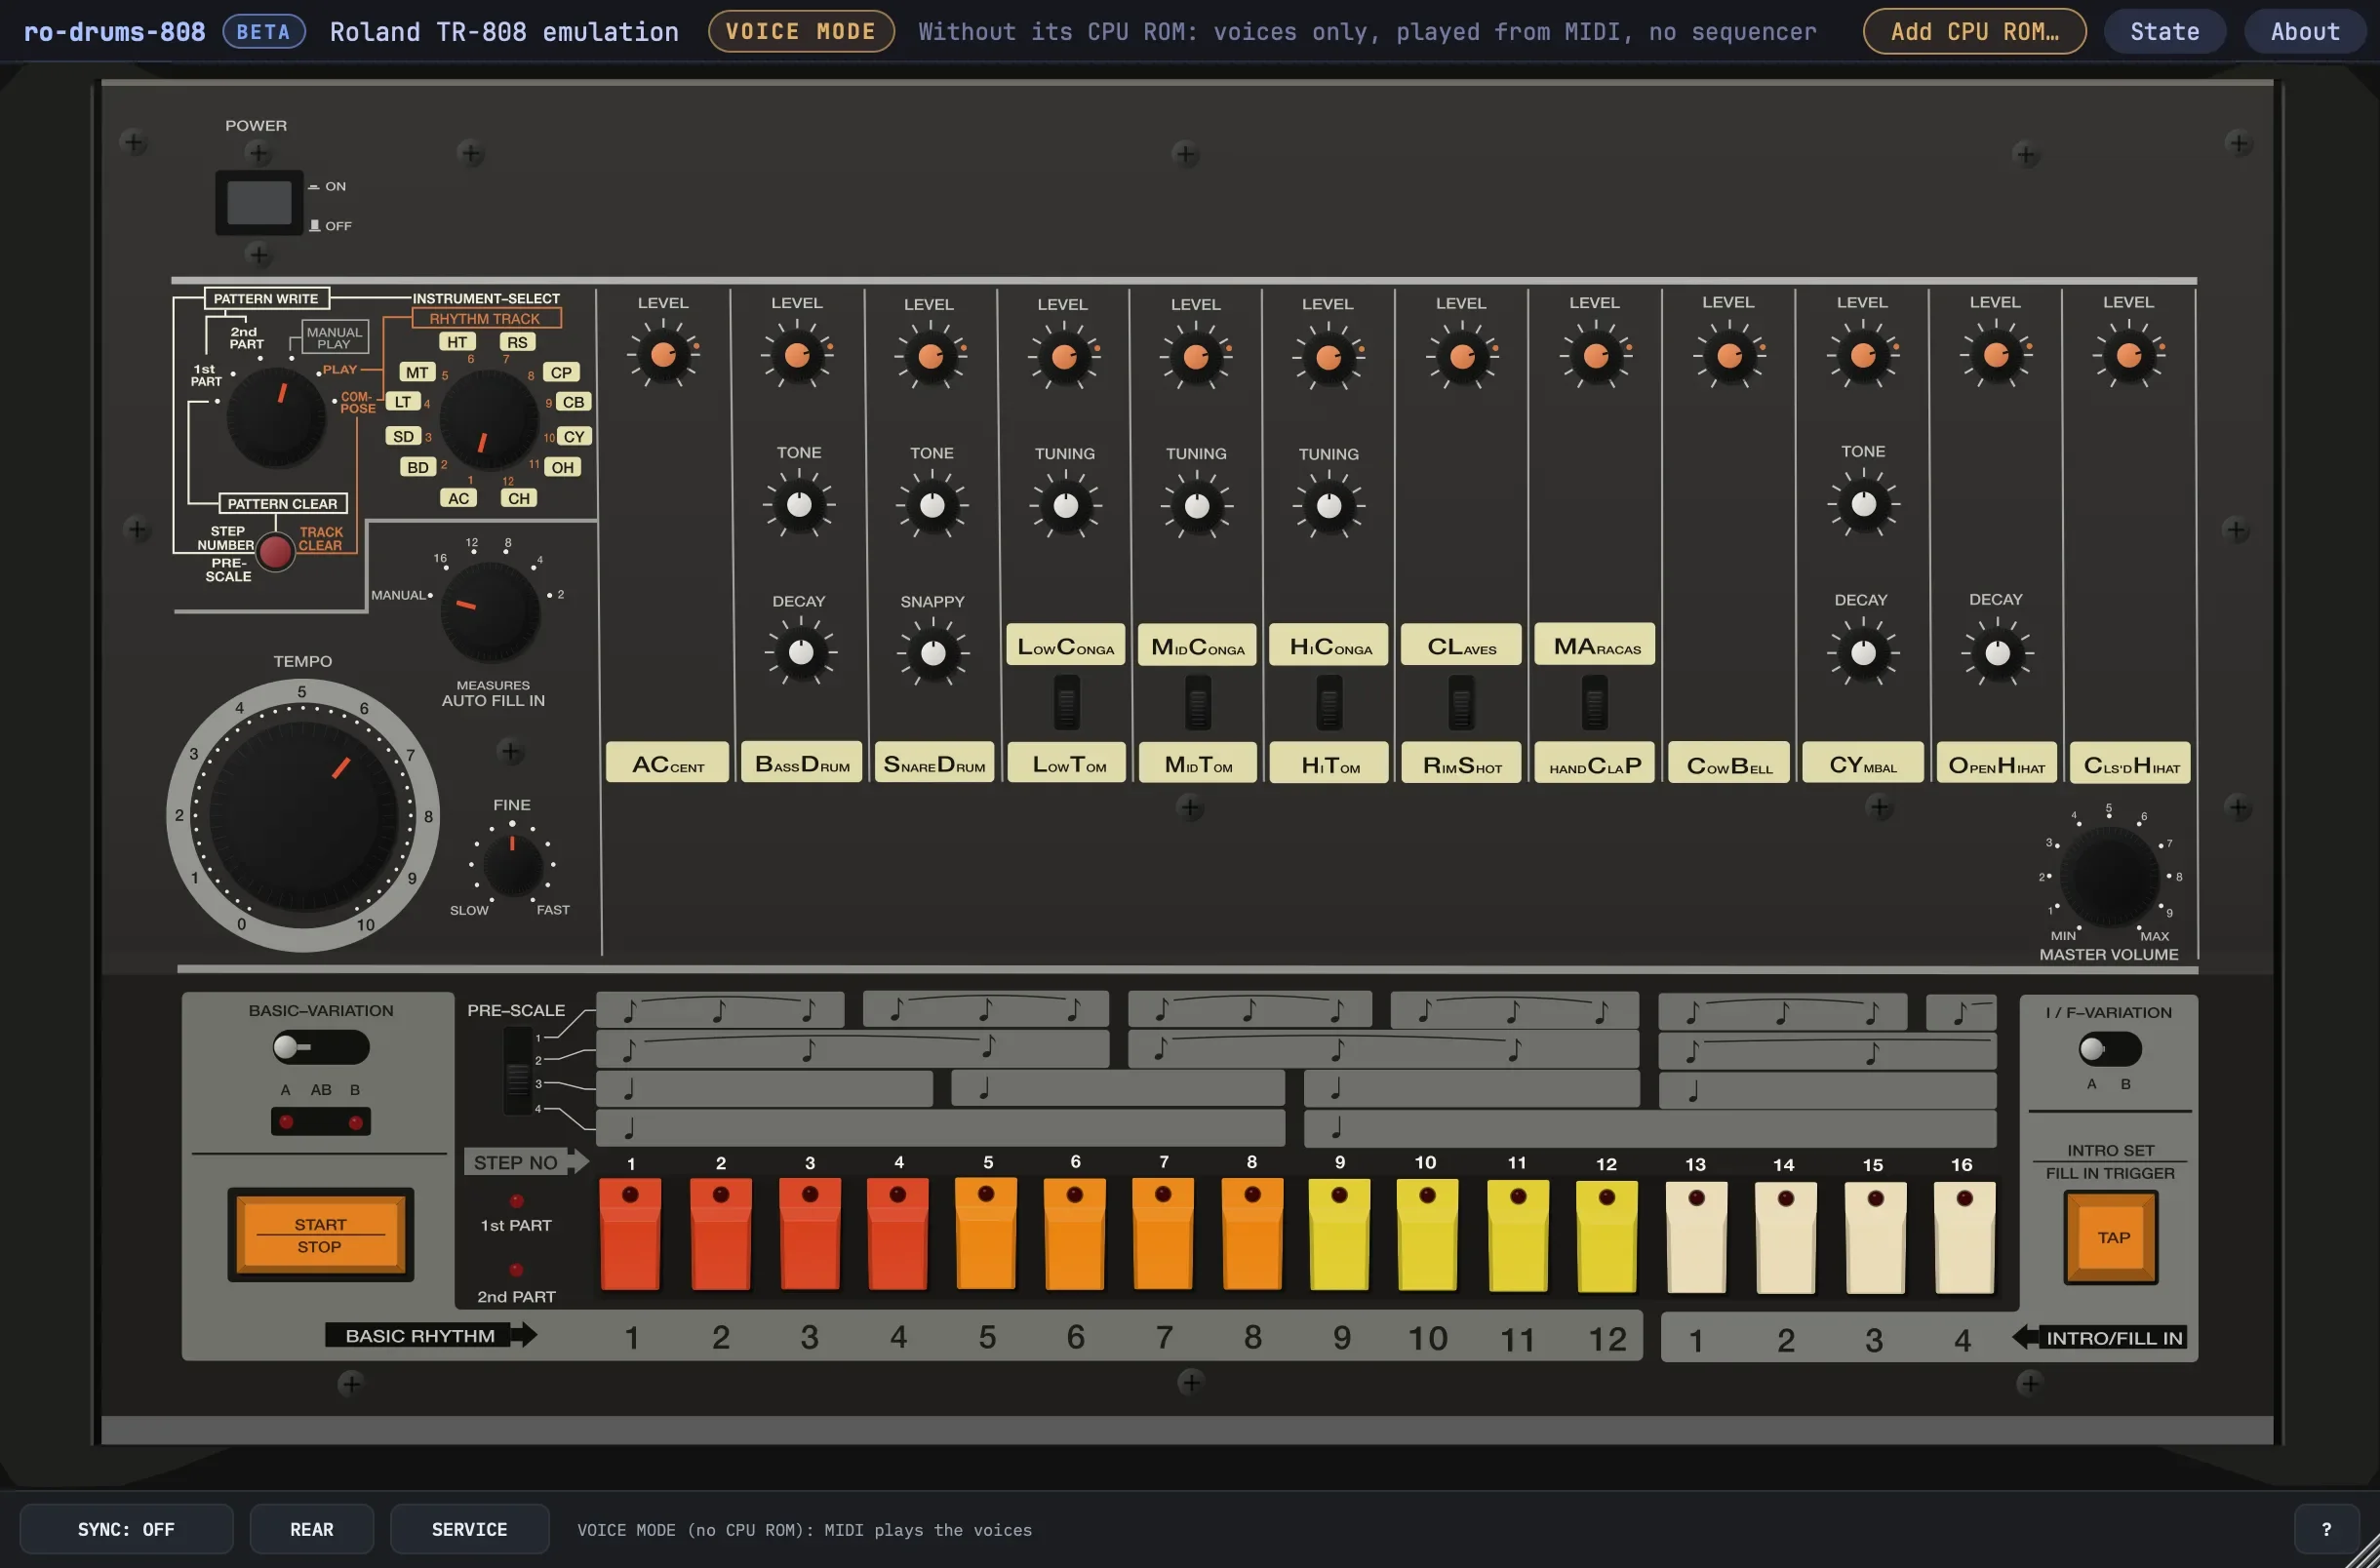
| With the ROM | Voice mode | |
|---|---|---|
| Sound | The voicing board | The same |
| MIDI notes | Play the voices directly; velocity 100 or more accents | The same |
| Knobs, voice switches, controllers, automation | Yes | Yes |
| Sequencer | The original firmware | None |
| Panel keys and LEDs | Work as on the unit | No effect |
| SYNC | Yes | No |
A session keeps its rhythms in voice mode. Adding the ROM later switches it to the full 808, keeping its knobs and memory.
Adding the ROM later
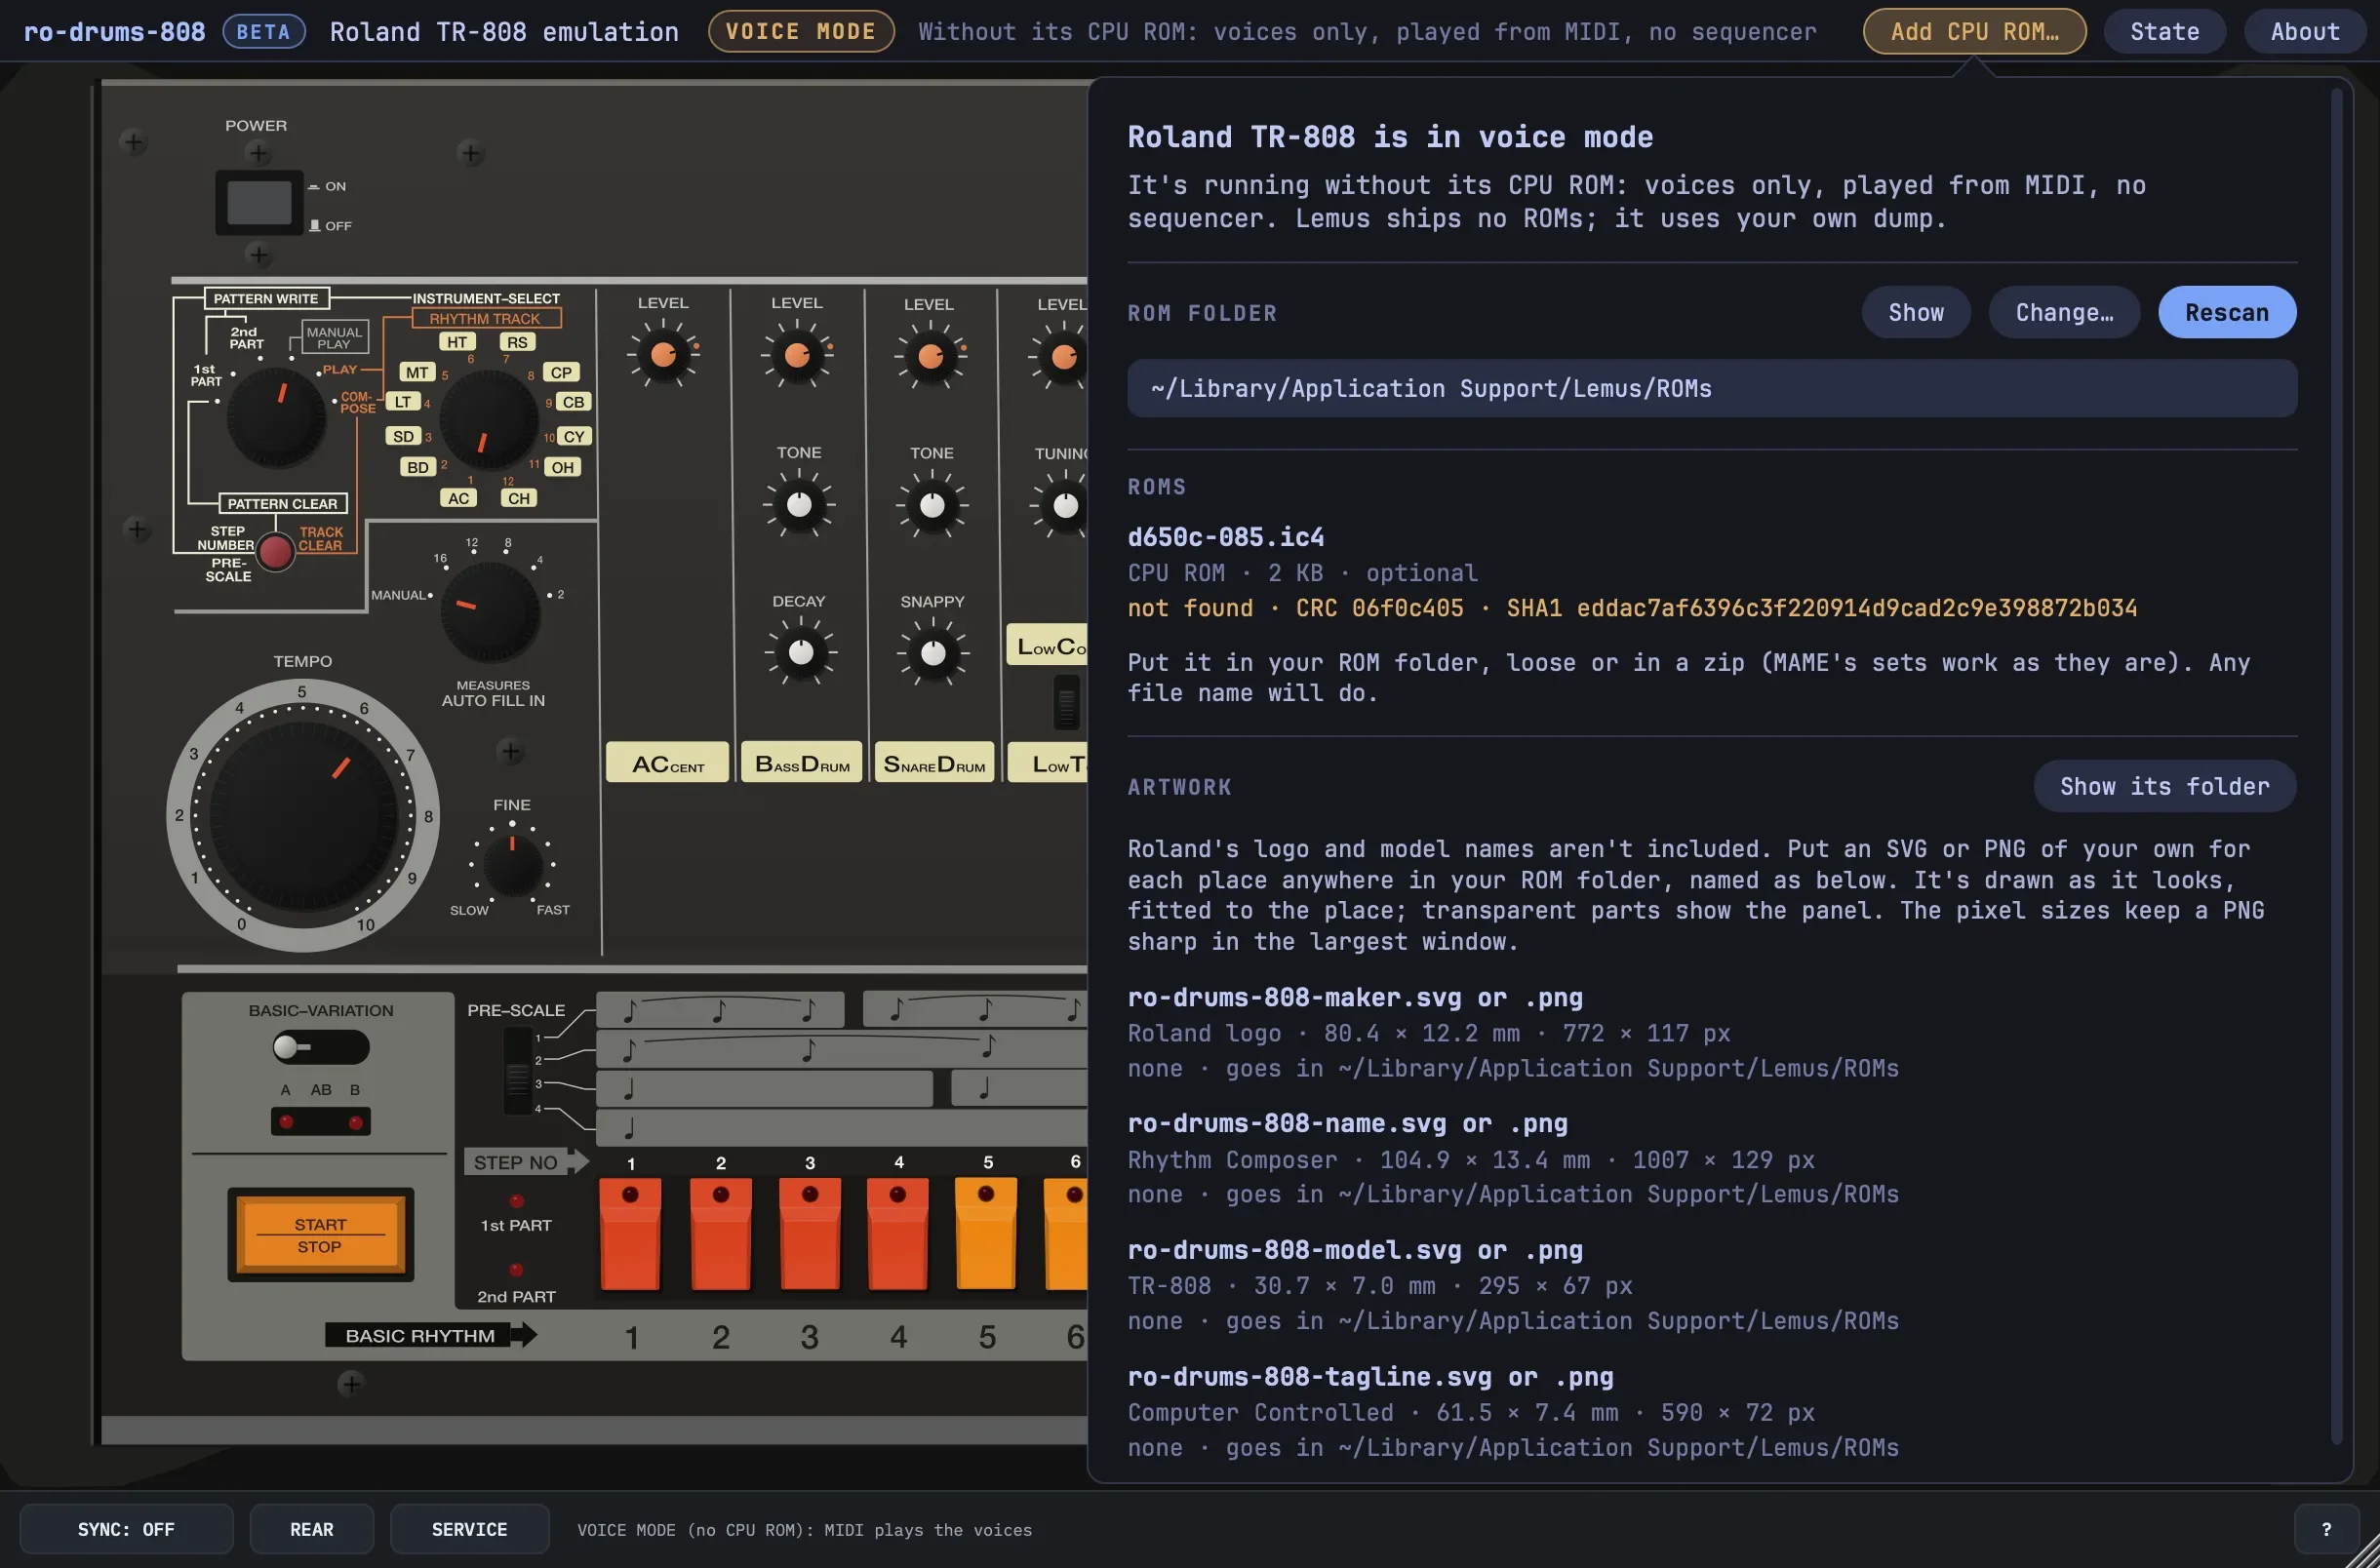
- Click Add CPU ROM… 1 in the top bar (with the ROM in place, the same button is ROMs).
- Put the ROM, or MAME's tr808.zip, in the folder shown, or choose your own with Change….
- Click Rescan. ro-drums-808 reloads with it.
The factory rhythms
A new 808 held rhythms written at the factory, printed as charts with it. A new instance holds them, and so does State: Reset.
| Key | Holds |
|---|---|
| BASIC RHYTHM 1, 2 | Empty: practice slots |
| BASIC RHYTHM 3–6 | Rock, Bossa Nova, Mambo, Samba, A and B |
| BASIC RHYTHM 7–11 | The rhythms for the factory tracks: A a drum kit, B mostly the Latin voices |
| BASIC RHYTHM 12 | Sound check: every voice on every step, A and B |
| INTRO/FILL IN 1 | Fill in 1, A and B |
| INTRO/FILL IN 2 | Fill in 2, A only |
| INTRO/FILL IN 3 | Fill in 3, A only: 12 + 12 steps at PRE-SCALE 2 |
| INTRO/FILL IN 4 | Empty: a practice slot |
A row plays whichever sound its voice switch picks. The two rhythm tracks composed at the factory aren't loaded: no document lists their bars, so the tracks start empty.
Panel artwork
The four blank places take an SVG or PNG of your own each, named as below, anywhere in the ROM folder (how artwork files work). ROMs in the top bar lists them with what each has, opens the folder with Show its folder, and reads it again with Rescan.
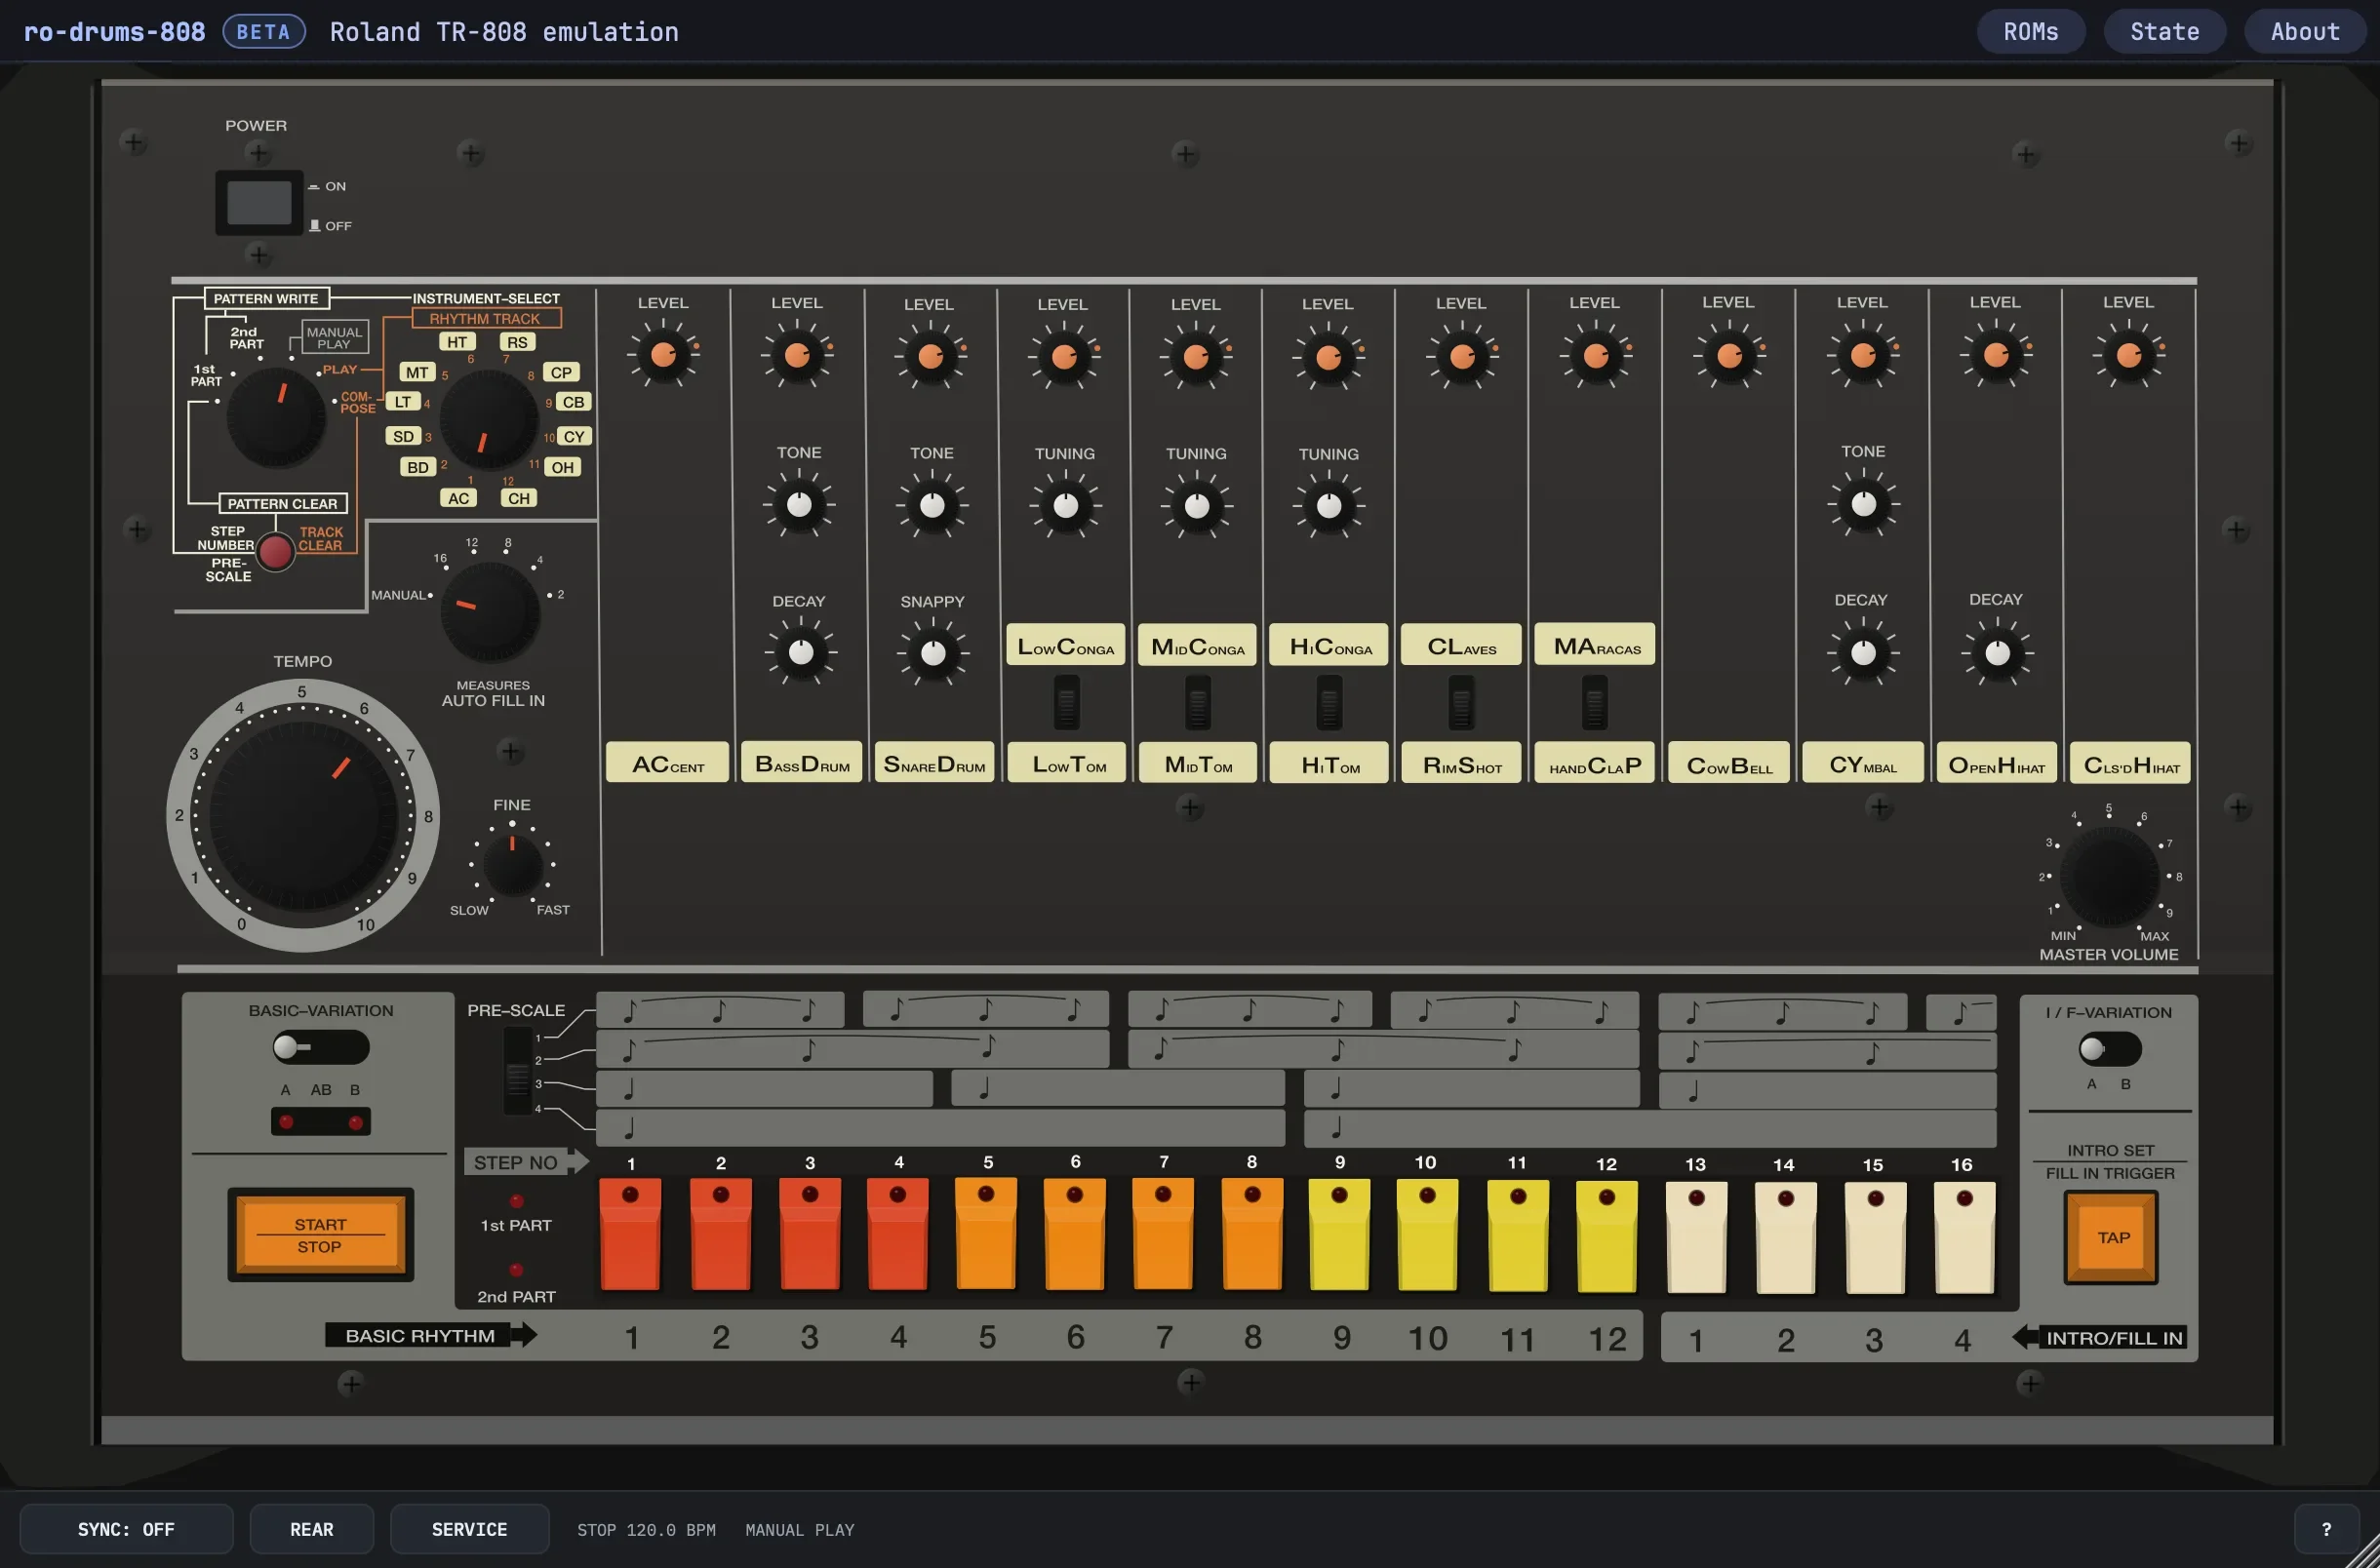
| File | Place | Size | A sharp PNG |
|---|---|---|---|
| ro-drums-808-maker.svg or .png | Roland logo | 80.4 × 12.2 mm | 772 × 117 px |
| ro-drums-808-name.svg or .png | Rhythm Composer | 104.9 × 13.4 mm | 1007 × 129 px |
| ro-drums-808-model.svg or .png | TR-808 | 30.7 × 7.0 mm | 295 × 67 px |
| ro-drums-808-tagline.svg or .png | Computer Controlled | 61.5 × 7.45 mm | 590 × 72 px |
- The plain names (maker.svg…) in artwork/tr808/ or artwork/tr808.zip work too, and win over these.
- A tr808.svg still fills the places without a file: its elements roland, rhythm_composer, tr808 and computer_controlled, in panel millimetres, filled in the print colour.
Your first sound
- From MIDI, in both modes: see MIDI notes.
- From the sequencer, with the ROM: a new instance starts on BASIC RHYTHM 1, which is empty. Leave MODE 1 on MANUAL PLAY, press step key 3 2 and hold it for a moment: that's Rock. Press START 3.
- With SYNC: HOST, while the DAW plays, its transport runs the 808: see Sync.
The panel at a glance
Drawn from measured photos of an original, its printed features to within about 0.3 mm of each other.
- 1 POWER
- On the top panel on this machine: see POWER.
- 2 MODE
- Six positions: the MODE switch. MANUAL PLAY by default.
- 3 INSTRUMENT-SELECT / RHYTHM TRACK
- Twelve positions: in pattern write, the voice to write or AC, the accent; in PLAY and COMPOSE, the track.
- 4 CLEAR
- Erases a pattern or a track, takes the PRE-SCALE setting, and with a step key sets a part's length. It depends on MODE.
- 5 AUTO FILL IN
- MANUAL, or a fill every 16, 12, 8, 4 or 2 bars: see AUTO FILL IN.
- 6 TEMPO
- About 30 to 300 BPM, 120 by default. Ignored while the DAW plays with SYNC: HOST.
- 7 FINE
- Fine tempo, at 12 o'clock by default.
- 8 ACCENT LEVEL
- How much a step with AC raises the voices on it.
- 9 Voice knobs
- BD: LEVEL, TONE, DECAY. SD: LEVEL, TONE, SNAPPY. LT/LC, MT/MC, HT/HC: LEVEL, TUNING. RS/CL, CP/MA, CB, CH: LEVEL. CY: LEVEL, TONE, DECAY. OH: LEVEL, DECAY. All 0 to 10; the LEVELs start at the printed mark (7.5), the others at 5.
- 10 Voice switches
- LC/LT, MC/MT, HC/HT, CL/RS, MA/CP: which of two sounds the row plays. See the voice switches.
- 11 MASTER VOLUME
- The main output's level, 7 by default. The MULTI OUTs don't go through it.
- 12 BASIC-VARIATION
- A, AB or B. The LEDs under it show which is playing, or stopped, which plays first.
- 13 START/STOP
- Starts and stops the sequencer. It does nothing while the DAW plays with SYNC: HOST.
- 14 PRE-SCALE
- Steps a beat: see PRE-SCALE. 3 by default.
- 15 Scales
- Printed above the step keys: what a step is worth at each PRE-SCALE setting.
- 16 1st PART, 2nd PART
- The part playing; stopped, 1st PART.
- 17 Step keys 1–16
- BASIC RHYTHM 1 to 12 and INTRO/FILL IN 1 to 4, and the steps of a pattern while writing. Their LEDs show the steps or the selected rhythm.
- 18 I/F-VARIATION
- A or B of the intro or fill.
- 19 TAP
- Sets an intro, triggers a fill, and writes in real time: see Intros and fills and Tap write.
- 20 Bottom bar
- SYNC, REAR and SERVICE: see the bottom bar.
POWER
The POWER switch 1 is on the top panel on this machine, not the rear. Off, the 808 is silent and dark, its memory kept. On restarts the firmware with the memory as it was, and the voicing board from discharged capacitors behind the unit's 1.5 s mute.
A new instance starts switched on, playable at once. POWER isn't saved with a session.
The sequencer
How it's organised
- 32 patterns: BASIC RHYTHM 1 to 12 and INTRO/FILL IN 1 to 4, each with variations A and B. The INTRO/FILL IN keys are step keys 13 to 16.
- A pattern is a 1st part of 1 to 16 steps and a 2nd part of 0 to 16, so 1 to 32 steps. A and B of one key share their lengths and PRE-SCALE.
- 12 rhythm tracks of 64 bars: see Rhythm tracks.
- The memory is saved with the session. There is no clearing it all, as on the unit: State: Reset makes a new instance, the factory rhythms with it.
The MODE switch
Everything starts from MODE 1.
| Position | What it's for |
|---|---|
| PATTERN CLEAR | Stopped: a step key picks a pattern, a variation switch its variation, and CLEAR 3 erases it. |
| 1st PART, 2nd PART | Pattern write. Stopped: a step key picks the pattern. Running: the step keys write that part of it. |
| MANUAL PLAY | Play rhythms. The default. |
| PLAY | Play a rhythm track. |
| COMPOSE | Record a rhythm track, in real time. |
Move MODE only while stopped, as the manual asks. The exception is 1st PART to 2nd PART while writing. In MANUAL PLAY and PLAY the memory can't be written, as on the unit.
Holding keys
- The firmware reads the step keys once a step and clears its latches each step. Hold a key for about a step: a shorter press can be missed, and two presses inside one step count as one. As on the unit.
- CLEAR with a step key: right-click (ctrl-click on a Mac) CLEAR to hold it until it's clicked again; the status bar names it. Or use the computer keys, which stay down while held.
Play rhythms
- Set MODE to MANUAL PLAY. Press a BASIC RHYTHM key 1, step keys 1 to 12. Its LED blinks.
- Set BASIC-VARIATION 2: A, AB or B.
- Press START/STOP 3.
- A rhythm chosen while one plays starts at the next bar. Chosen during the bar's first beat, it starts at beat 2 of that bar, from its own beat 2.
- BASIC-VARIATION takes effect at the next bar. AB alternates A and B every bar, starting on A.
Intros and fills: TAP
In MANUAL PLAY an INTRO/FILL IN key 1 only selects a fill. TAP 3 plays it. I/F-VARIATION 2 picks A or B.
- Intro: stopped, press TAP. The selected INTRO/FILL IN LED blinks. START then plays it once, then the basic rhythm. TAP again cancels it.
- Fill: while a rhythm runs, press TAP. The selected INTRO/FILL IN plays once in place of the next bar.
AUTO FILL IN
Set to 2, 4, 8, 12 or 16, it inserts the selected INTRO/FILL IN every that many bars; the intro isn't counted. TAP still adds fills. MANUAL turns it off. It works in MANUAL PLAY and COMPOSE and does nothing in PLAY.
Write a pattern
- Stopped, turn MODE 1 to PATTERN CLEAR. Press the pattern's key 3. Set its variation: BASIC-VARIATION 7 for a basic rhythm, I/F-VARIATION 8 for an intro or fill.
- Press CLEAR 2. The pattern is empty: 16 steps in the 1st part, none in the 2nd.
- Turn MODE to 1st PART and press START/STOP 4. The pattern runs while you write.
- Set PRE-SCALE 5 and press CLEAR. It takes the setting only then.
- Turn INSTRUMENT-SELECT 6 to a voice, or to AC for the accent, and press step keys 3: a press puts it on that step or takes it off. The LEDs show that voice's steps, with a running light.
- Repeat for the other voices.
- Press START/STOP and turn MODE back to MANUAL PLAY. The rhythm is in memory.
Length and the 2nd part
- Running, with MODE on 1st PART or 2nd PART: hold CLEAR and press step key n. That part has n steps. Repeat it to correct a wrong press. Notes past the end are kept.
- A and B of one key always share their lengths and PRE-SCALE.
- A 2nd part: with the 1st part written and the pattern running, turn MODE to 2nd PART. The LEDs go dark: it has no steps yet. Hold CLEAR and press step key n. Then write it the same way.
- Only the part MODE selects shows on the LEDs and takes writes. The two parts always play as one pattern, 1st then 2nd, and a rhythm or fill change waits for the end of the pattern.
- Once a 2nd part has a length, only clearing the pattern takes it back to none.
PRE-SCALE
The steps a beat, set while running, with CLEAR. Choose the setting for the smallest note in the rhythm. A pattern has one PRE-SCALE; TEMPO is per beat at all of them.
| PRE-SCALE | Steps a beat | A step is |
|---|---|---|
| 1 | 3 | 8th-note triplet |
| 2 | 6 | 16th-note triplet |
| 3 | 4 | 16th note |
| 4 | 8 | 32nd note |
Setting it again leaves the notes alone.
A and B
- BASIC-VARIATION on AB in PATTERN CLEAR erases A and B of a basic rhythm together.
- In 1st PART, set PRE-SCALE and the length once. Set the switch to A and write, then to B and write. With AB the bars alternate A and B while you write.
- An intro or fill is written the same way, with its key and I/F-VARIATION.
Tap write
While a pattern runs in 1st PART or 2nd PART, turn INSTRUMENT-SELECT to a voice and press TAP in time. It writes the voice at the nearest step, and that step's LED lights. A step key takes a note off; taps and step keys can be mixed.
Accent
Accent is INSTRUMENT-SELECT position 1, AC, written like a voice. A step with AC raises every voice on it by the ACCENT LEVEL knob.
The voice switches
- Five switches 1, LC/LT, MC/MT, HC/HT, CL/RS and MA/CP, each pick which of two sounds a shared row plays: up the conga, claves or maracas, down the tom, rim shot or hand clap.
- The two sounds of a pair can't play together. A pattern doesn't hold the switches: they can be moved at any time, while writing, composing or playing.
- MIDI's conga, claves and maracas notes play the same rows: the switch still picks the sound.
Rhythm tracks
A track holds one rhythm number a bar, 64 bars, in the order played. It stores no variation and no pattern data: editing a rhythm later changes every bar that uses it. INSTRUMENT-SELECT selects track 1 to 12.
COMPOSE
Composing is real time, not step entry.
- Stopped, turn MODE 1 to COMPOSE and INSTRUMENT-SELECT 2 to the track.
- Press CLEAR 3: the track is erased.
- Pick the first bar's rhythm 4, the way you would in MANUAL PLAY. Set the variation switches: they affect what you hear only.
- Press START/STOP 5. Change rhythms as in MANUAL PLAY: every bar played is recorded. TAP and AUTO FILL IN insert fills, recorded too.
- In the last bar, press START/STOP: that bar becomes the last.
- A rhythm chosen during a bar's first beat sounds from beat 2 while composing, but the track plays it from beat 1 of that bar.
- Past 64 bars the composition runs on into the next track, overwriting it; after track 12, track 1. Turning INSTRUMENT-SELECT while composing does nothing.
Edit a track
Turn MODE to COMPOSE and press START/STOP without CLEAR. The track plays. A key pressed during a bar replaces that bar's rhythm. The number of bars can't change: past the last bar it wraps to the first. TAP doesn't work here: press the INTRO/FILL IN key itself.
PLAY
- Stopped, turn MODE to PLAY and INSTRUMENT-SELECT to the track. Set BASIC-VARIATION and I/F-VARIATION: a track doesn't store them.
- Press START/STOP. The track plays from bar 1, on into the next track if it runs past 64 bars, and repeats from bar 1 of the track it started on.
- Turning INSTRUMENT-SELECT while it plays takes effect when the composition ends.
- A rhythm key pressed while it plays replaces that one bar, not recorded.
- TAP and AUTO FILL IN do nothing here.
- AB alternates by bar number: an intro in bar 1 shifts A and B, unlike MANUAL PLAY.
The rear
REAR in the bottom bar shows the rear panel, seen from behind.
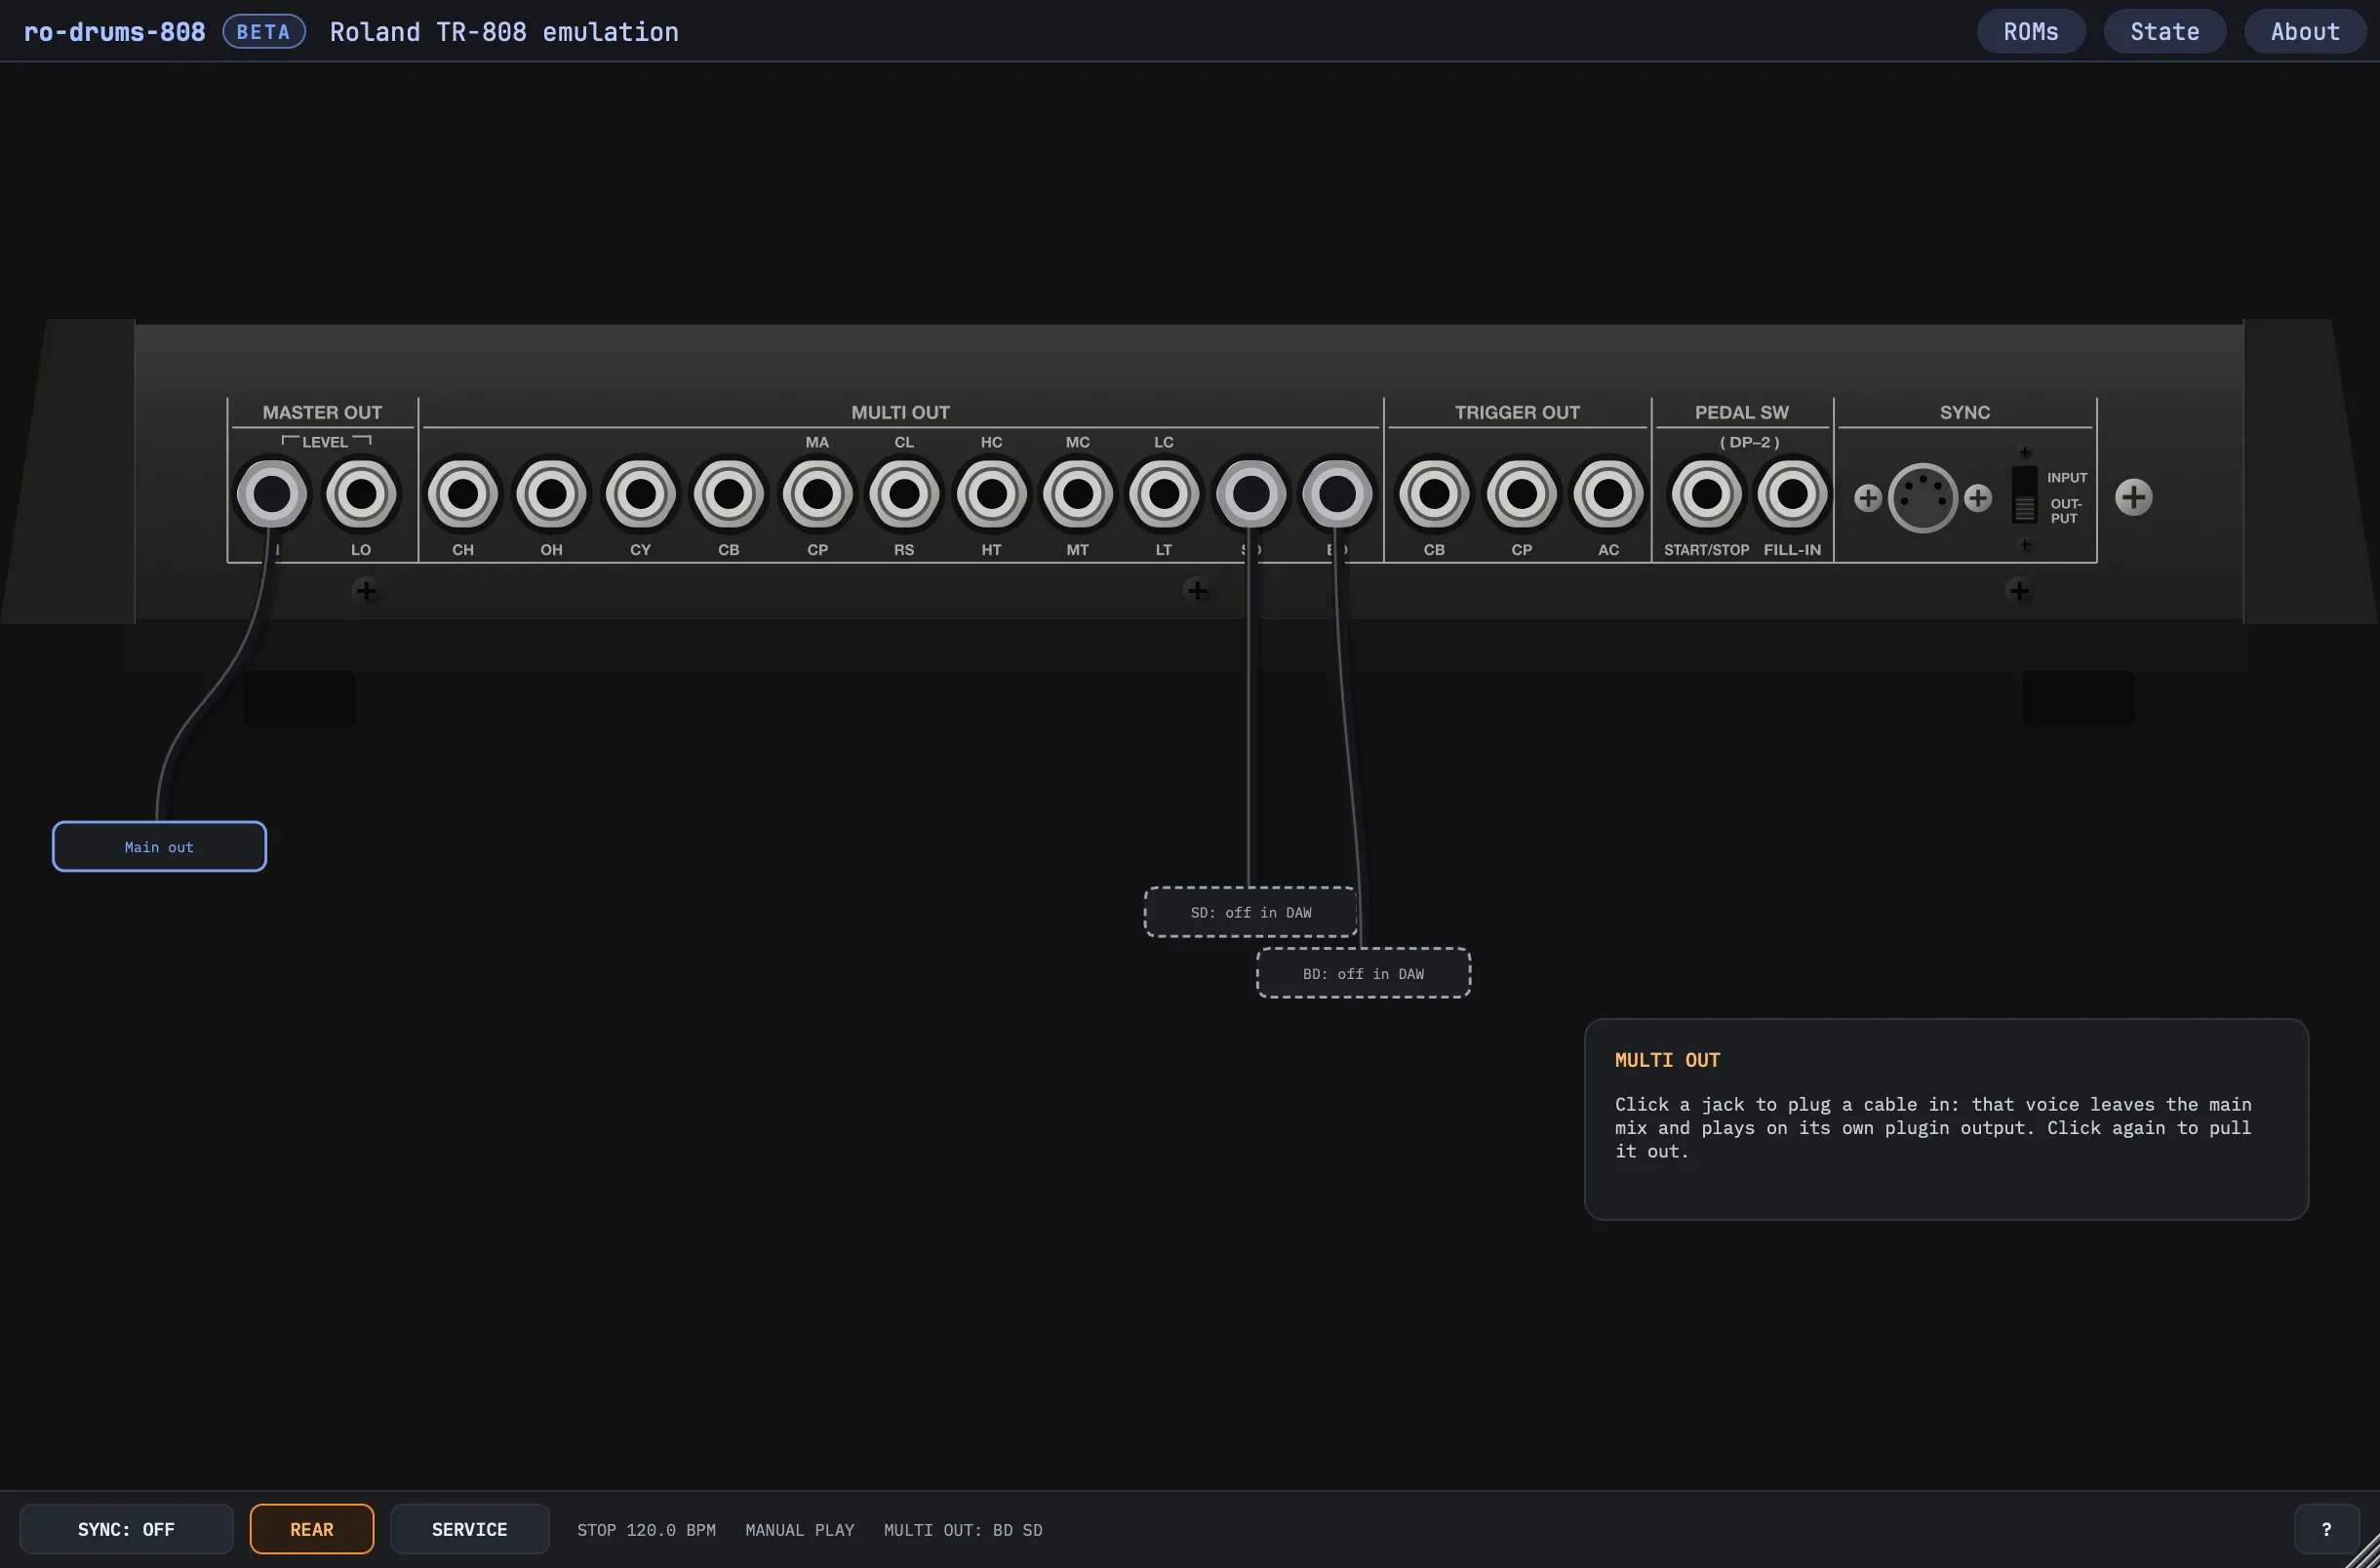
MULTI OUT
- A click on a MULTI OUT jack 1 plugs a cable in: as on the unit, its voice leaves the main mix for its own plugin output. A second click pulls it out. The cables are saved with the session.
- The plugin's outputs: the main pair, MASTER OUT HI 2, then BD, SD, LT/LC, MT/MC, HT/HC, RS/CL, CP/MA, CB, CY, OH and CH. These eleven are off until the DAW turns them on, mono or stereo (the jack on both sides).
- With no cable, a voice stays in the main pair and its output is silent, whatever outputs the DAW turns on. The label under a cable 3 says when the DAW has its output off.
- The main pair is one mix, the same on both sides. A MULTI OUT's level is its voice's LEVEL knob; MASTER VOLUME doesn't touch it.
The other jacks
The rest take no cable. MASTER OUT LO, TRIGGER OUT, PEDAL SW and SYNC 4 aren't emulated. For the DAW's transport, see Sync.
The bars and SERVICE
The top bar
- BETA after the name: this version is a beta. About shows the version.
- VOICE MODE and a line saying what's missing, while ro-drums-808 runs without its ROM.
- ROMs: the ROM folder, the ROM and the artwork, with their full paths, and Show, Change… and Rescan for the folder. In voice mode it reads Add CPU ROM…: see Adding the ROM later.
- State: see State.
- About: the version, the ROM folder and artwork in use, the update check, and links to this guide, the site and the forum. A newer version shows as a button in the bar.
State
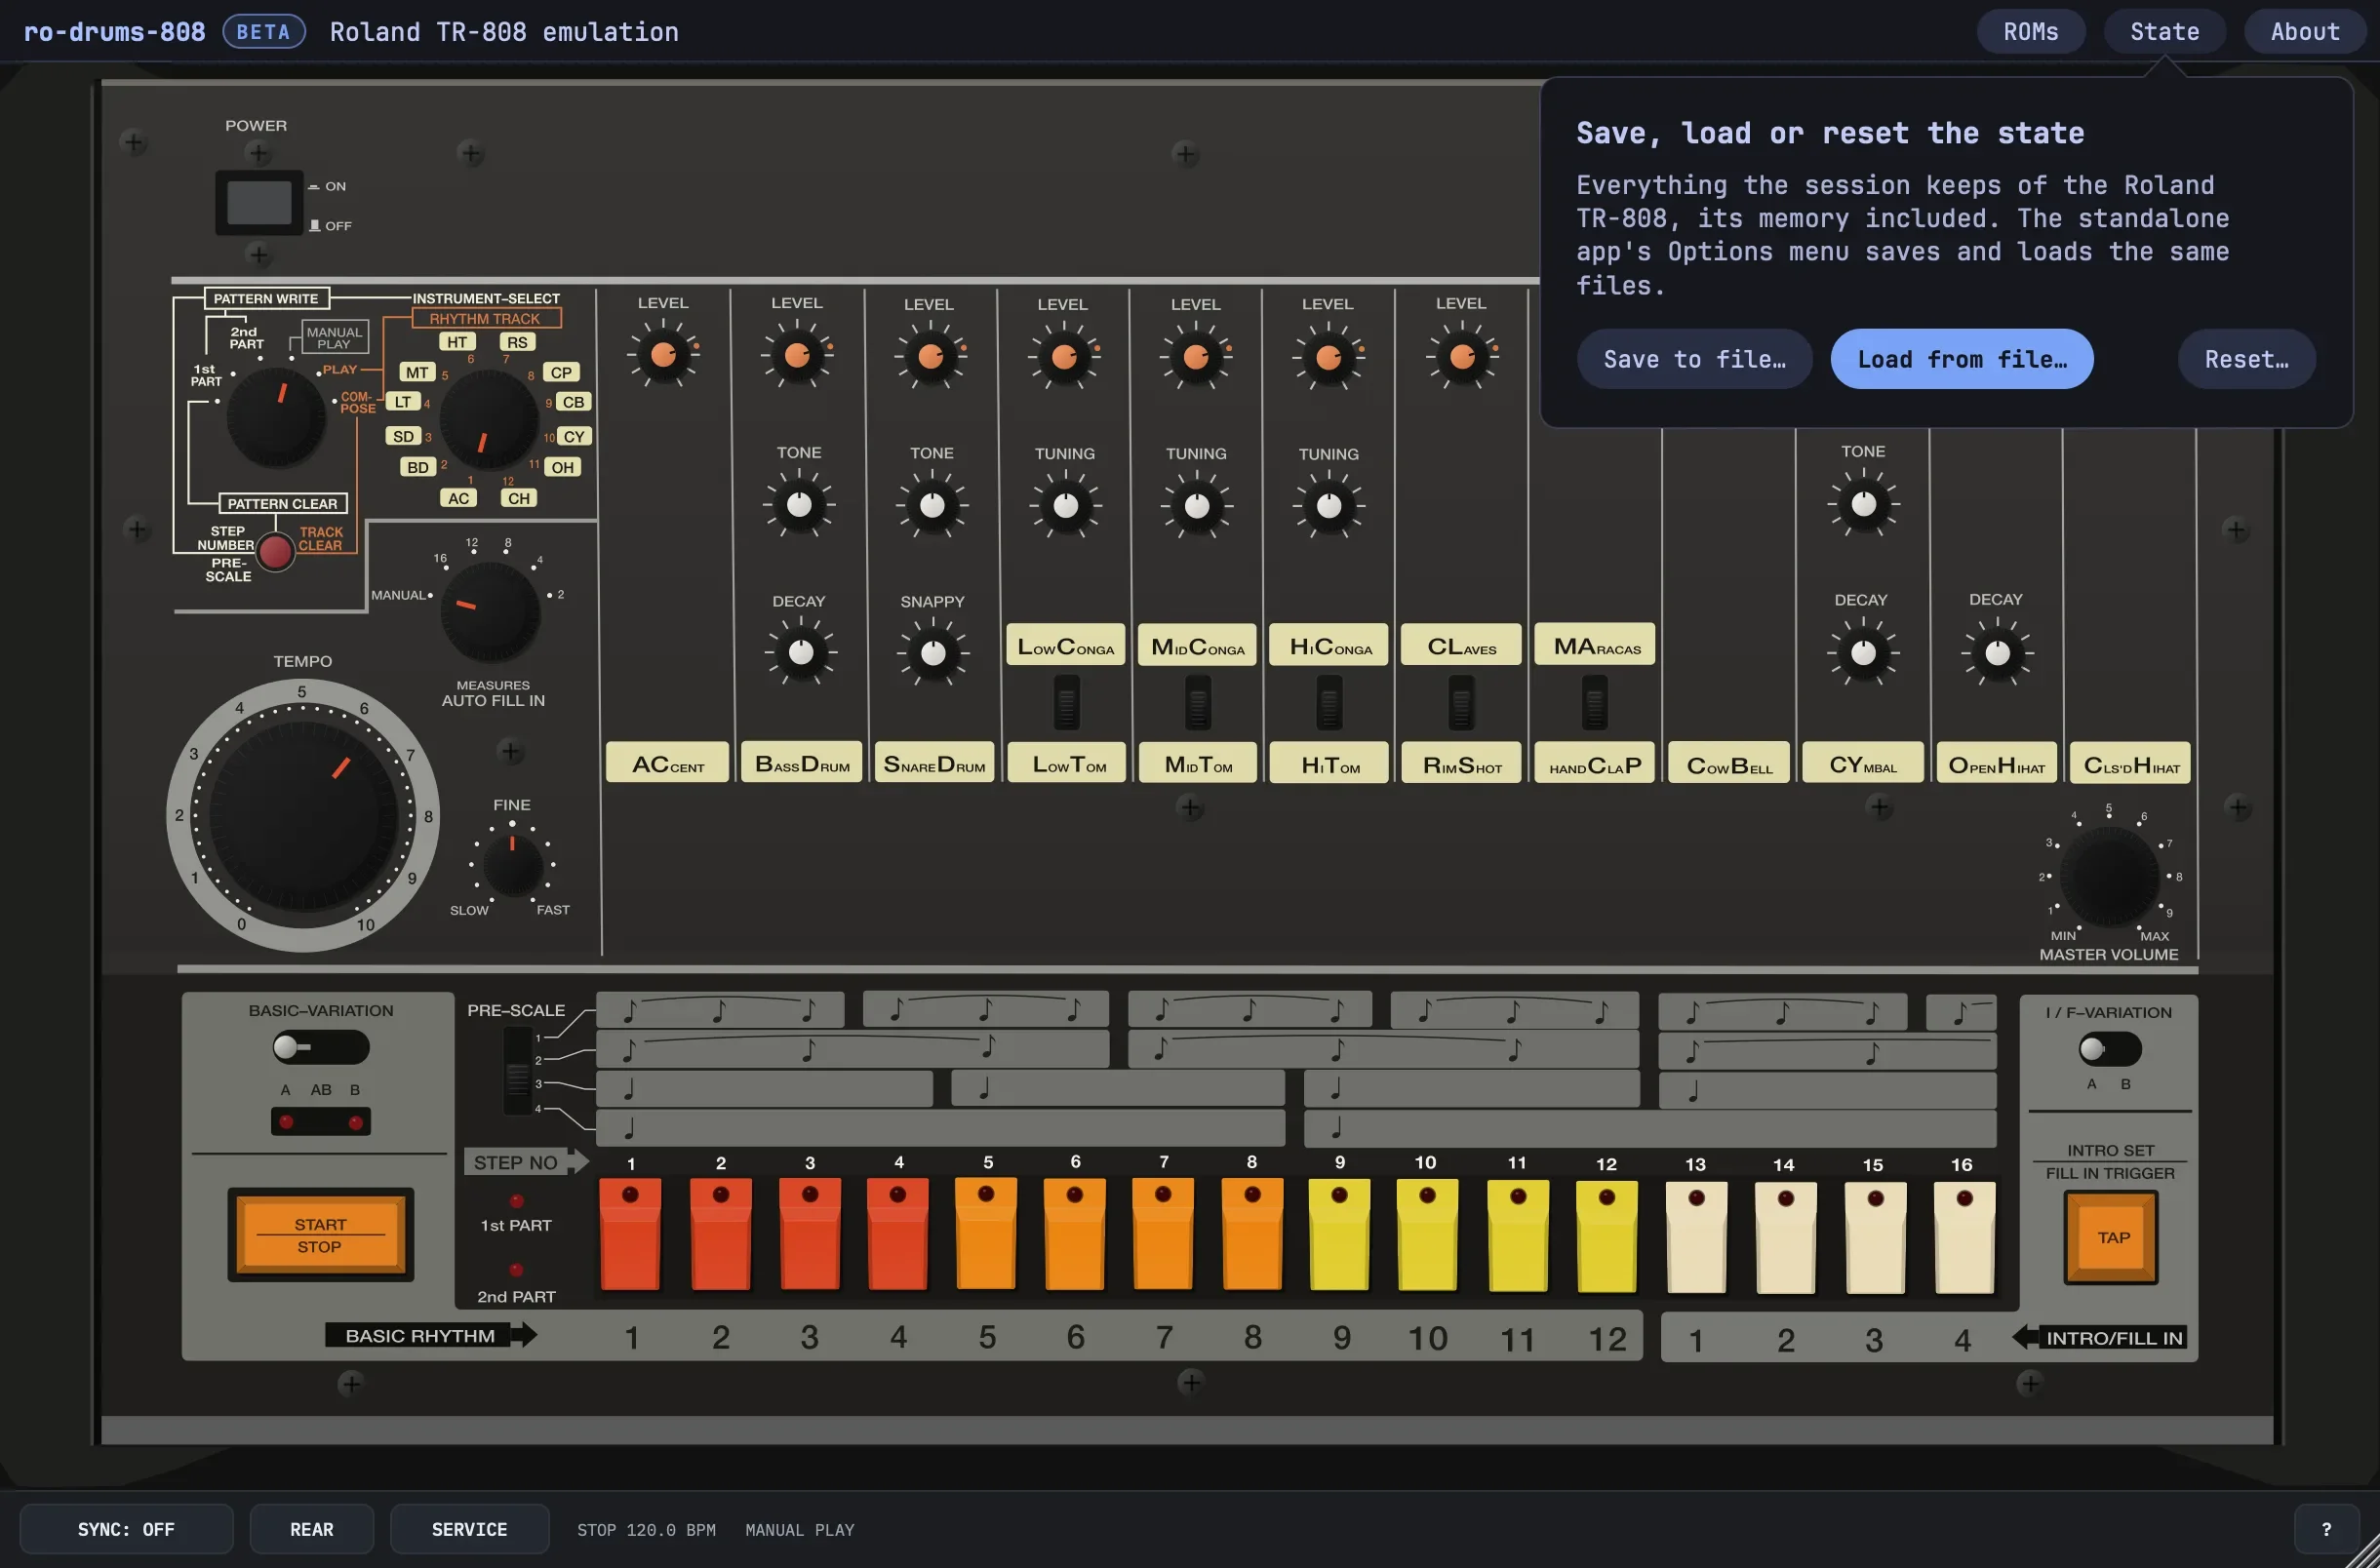
- Save to file… saves the instance: the knobs and switches, the pattern and track memory, the MULTI OUT cables and SERVICE's trimmers, serial number and snare and clap values.
- Load from file… loads one. The standalone app's Options menu saves and loads the same files.
- Reset… makes it a new instance: the factory rhythms, and every control at its default.
The bottom bar
- 1 SYNC
- OFF: the 808 runs on its own clock. HOST: your DAW's transport runs it. See Sync.
- 2 REAR
- The rear panel: MULTI OUT.
- 3 SERVICE
- Takes the top panel off to show the boards. See SERVICE.
- 4 Status line
- STOP, RUN or HOST, the tempo and the MODE position; POWER OFF; voice mode; the MULTI OUTs with a cable in; a key held by a right-click. In SERVICE, the serial number and what's under the pointer. At the right, the voices sounding.
- 5 ?
- Shows the list of computer keys over the panel. Any click, ? or Escape closes it.
SERVICE: the boards, the trimmers and the scope
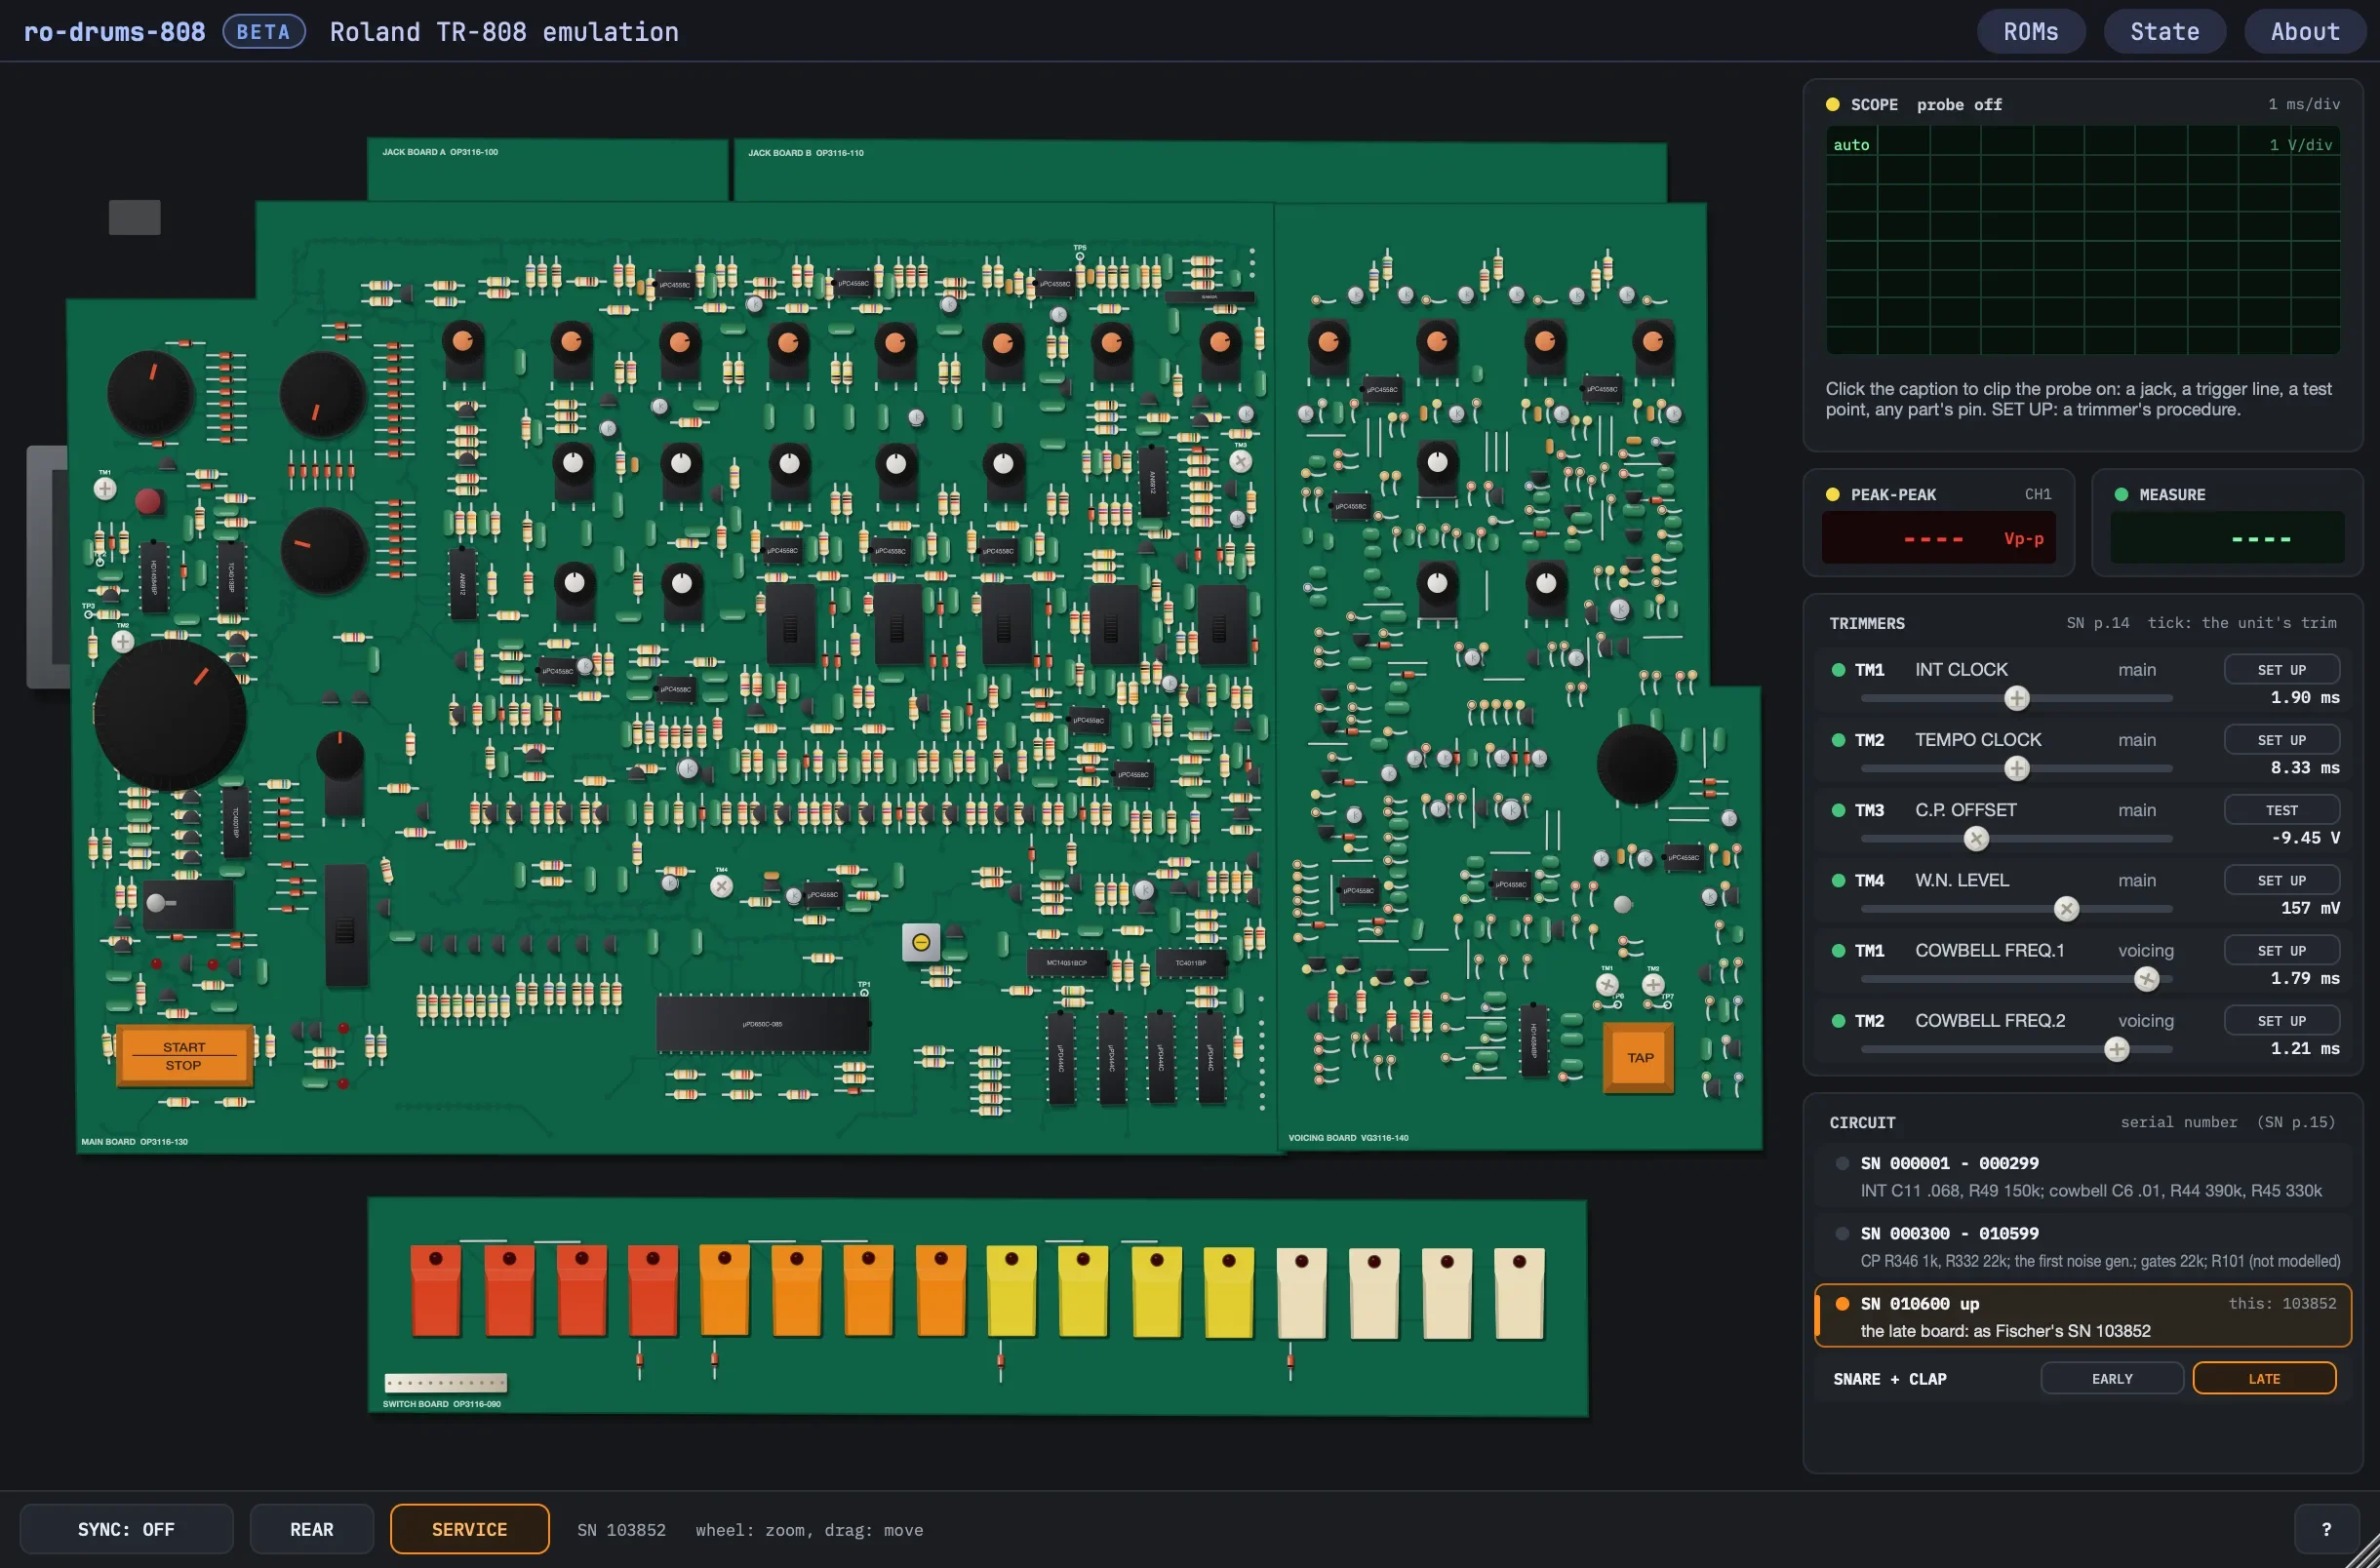
The top panel comes off: the main and voicing boards where they hang on their pots, the switch board folded out in front of them on its harness, jack boards A and B behind the main board's rear edge and the transformer beside them; the power supply lies under it, out of sight. Every part is where the service notes' board drawings put it, drawn as the part it is with its value, the copper showing faintly through. The knobs stay on their pots and the keys on their switches, and work as on the panel; the LEDs run. The wheel or a pinch zooms, and the parts' designators show close up; a drag moves; a double-click shows it all.
- The scope 1: click its caption to clip the probe on a MULTI OUT, MASTER OUT HI or LO, a trigger line, a test point (TP2 to TP7) or any pin of any part the netlists draw. It runs free, triggers on the probe's own rise, or on a voice's gate; time and volts per division are set from their captions. While a probe is on, the board doesn't sleep.
- The readouts 2: the sweep's peak to peak, and what a procedure reads on its test point: a period in ms, TP4's AC volts in mV rms over 0.2 s, TP5's peak to peak.
- Trimmers 3: the six of the service notes' adjustment (SN p.14), each modelled from its part and circuit, below. Drag one on its board or along its row, shift finer; a double-click puts it back to the chosen unit's trim, the tick in its row. SET UP clips the probe on its test point and sets the time base, volts and trigger the procedure needs; TM3's TEST also plays the clap every 0.6 s, unaccented. What a procedure asks of the knobs (TEMPO and FINE fully clockwise for TM2, CP LEVEL fully clockwise for TM3) is said, not done.
- Circuit 4: which unit this is, by serial number (SN p.15): SN 000001 to 000299, 000300 to 010599, and 010600 up, the late board, the default: SN 103852, the unit Lemus is fitted to.
- SNARE + CLAP 5: EARLY is those two voices as first drawn, LATE (the default) has the later values of the notes' PORTION CHANGED box (SN p.9, no serial number given).
The trimmers, the serial number and EARLY or LATE are saved with the session. Each change of the unit sets the trimmers to its trims and rebuilds the board.
| Trimmer | Sets | Test point | The notes | This unit |
|---|---|---|---|---|
| Main TM1 INT CLOCK | The CPU's interrupt clock | TP2 | 1.9 ms | 1.9 ms |
| Main TM2 TEMPO CLOCK | The tempo clock | TP3 | 8.33 ms | 8.33 ms |
| Main TM3 C.P. OFFSET | The clap's offset | TP5 | – | – |
| Main TM4 W.N. LEVEL | The noise's level | TP4 | 130 mV rms | 157 mV rms |
| Voicing TM1 COWBELL FREQ.1 | The cowbell's first square | TP6 | 1.85 ms | 1.79 ms |
| Voicing TM2 COWBELL FREQ.2 | The cowbell's second square | TP7 | 1.25 ms | 1.21 ms |
MIDI and your DAW
MIDI notes
The 808 has no MIDI. Lemus adds it, as Roland's TR-08 does: notes play the voices directly, alongside the sequencer, in both modes. The plugin sends no MIDI.
| Row | Notes |
|---|---|
| BD | 36, 35 |
| SD | 38, 40 |
| LT/LC | 43, 41, and 64 (low conga) |
| MT/MC | 47, 45, and 63 (mid conga) |
| HT/HC | 50, 48, and 62 (high conga) |
| RS/CL | 37, and 75 (claves) |
| CP/MA | 39, and 70 (maracas) |
| CB | 56 |
| CY | 49, 57 |
| OH | 46 |
| CH | 42, 44 |
- Velocity 100 or more adds the accent. Note-offs are ignored. Any channel.
- The conga, claves and maracas notes play their shared rows: the voice switch picks the sound.
- Notes in the same sample share one trigger, as voices on one step do.
Controllers
Control changes on any channel move the knobs, on Roland's TR-8 numbers for the same controls.
| Voice | LEVEL | Others |
|---|---|---|
| BD | 24 | TONE 21, DECAY 23 |
| SD | 29 | TONE 25, SNAPPY 26 |
| LT/LC | 48 | TUNING 46 |
| MT/MC | 51 | TUNING 49 |
| HT/HC | 54 | TUNING 52 |
| RS/CL | 57 | |
| CP/MA | 60 | |
| CB | 88 | |
| CY | 85 | TONE 83, DECAY 84 |
| OH | 82 | DECAY 81 |
| CH | 63 | |
| ACCENT | 71 | |
| MASTER VOLUME | 7 |
Sync
- SYNC: OFF (the default): START/STOP, TEMPO and FINE run the 808's own clock.
- SYNC: HOST: with the DAW playing, its transport is the 808's DIN sync input, run and a 24 ppqn clock. The rhythm starts with the transport and follows its tempo. START/STOP does nothing while it plays; when the DAW stops, the 808 stops, and START/STOP runs it on its own clock again.
- The pattern starts where the DAW starts: the 808 has no song position. Its steps land 4.5 to 5 ms after the DAW's grid, as DIN sync makes them.
Automation and sessions
These parameters can be automated, in this order: Accent Level, BD Level, BD Tone, BD Decay, SD Level, SD Tone, SD Snappy, LT/LC Level, LT/LC Tuning, MT/MC Level, MT/MC Tuning, HT/HC Level, HT/HC Tuning, RS/CL Level, CP/MA Level, CB Level, CY Level, CY Tone, CY Decay, OH Level, OH Decay, CH Level, Master Volume, Tempo, Fine, Mode, Instrument / Rhythm Track, Auto Fill In, Basic Variation, I/F Variation, Pre-Scale, Low Conga, Mid Conga, Hi Conga, Claves, Maracas, Sync to Host, and the six trimmers: TM1 INT Clock (main), TM2 Tempo Clock (main), TM3 C.P. Offset (main), TM4 W.N. Level (main), TM1 Cowbell Freq.1 (voicing) and TM2 Cowbell Freq.2 (voicing).
A session saves every parameter, the pattern and track memory, the MULTI OUT cables, and SERVICE's serial number and snare and clap values.
Idle, the voices put out exact zeros and use little CPU, but the CPU keeps running: the sequencer and LEDs carry on. A trigger or a knob wakes it. ro-drums-808 reports a 2 s tail. Don't let the DAW suspend it on silent tracks, or the 808 can't play its own rhythms.
Keyboard and mouse
Computer keys
Click the panel first. Keys stay down while held, so CLEAR with a step key works.
| Keys | Panel |
|---|---|
| 1 2 3 4 5 6 7 8 | Step keys 1 to 8 (BASIC RHYTHM 1 to 8) |
| Q W E R T Y U I | Step keys 9 to 16 (BASIC RHYTHM 9 to 12, INTRO/FILL IN 1 to 4) |
| Backspace, Delete | CLEAR |
| Return | TAP |
| F1 F2 F3 F4 F5 F6 | MODE: PATTERN CLEAR, 1st PART, 2nd PART, MANUAL PLAY, PLAY, COMPOSE |
| Space | START/STOP in the standalone app (in a DAW, Space is the DAW's) |
| ? | The key list |
| Escape | Closes the key list and lets go of every key |
Some DAWs keep letter keys for themselves.
Mouse
- Knobs and TEMPO: drag up or down; shift is finer, double-click resets, the wheel works, hover shows the value.
- Rotary switches (MODE, INSTRUMENT-SELECT, AUTO FILL IN): click a position's dot, click the knob for the next position (right-click for the one before), or drag or use the wheel.
- Slide and lever switches: click the position.
- Keys are held while the button is. A right-click (ctrl-click on a Mac) holds one down until it's clicked again, and the status bar names it; START/STOP doesn't hold. Escape lets go of all.
- Window: drag the bottom-right corner, half to twice the size.