ac-digital-vc user guide
ac-digital-vc runs the Virus C's own firmware, OS 6.6: what you know from a Virus C applies here, and its owner's manual describes the sounds, the menus and the multi mode. This guide covers what the plugin adds or leaves out. Installing is on the download page; the ROM folder, artwork files, the update check and contact are on Support.
Getting started
The first start
The firmware and the factory programs are the unit's flash, Access's copyrighted work, so Lemus doesn't include them, and without them ac-digital-vc has nothing to run. The first time it starts without the ROM it asks for it: Locate ROM… takes the image, a zip holding it such as MAME's virusc.zip, or a folder. A file is checked and copied into the ROM folder; a folder becomes the ROM folder.
Then the firmware boots, as the unit does when it's switched on, and plays a few seconds later.
The ROM
One image, from MAME's virusc set, found by checksum anywhere in the ROM folder.
| File | Size | SHA1 | Holds |
|---|---|---|---|
| virus_c_660x368.bin | 524,288 bytes | 4c34546889d90522a8d85300c471f18339f88f72 | BIOS v6.6: the 80C515's program, the DSP's program and the factory banks C to H |
Panel artwork
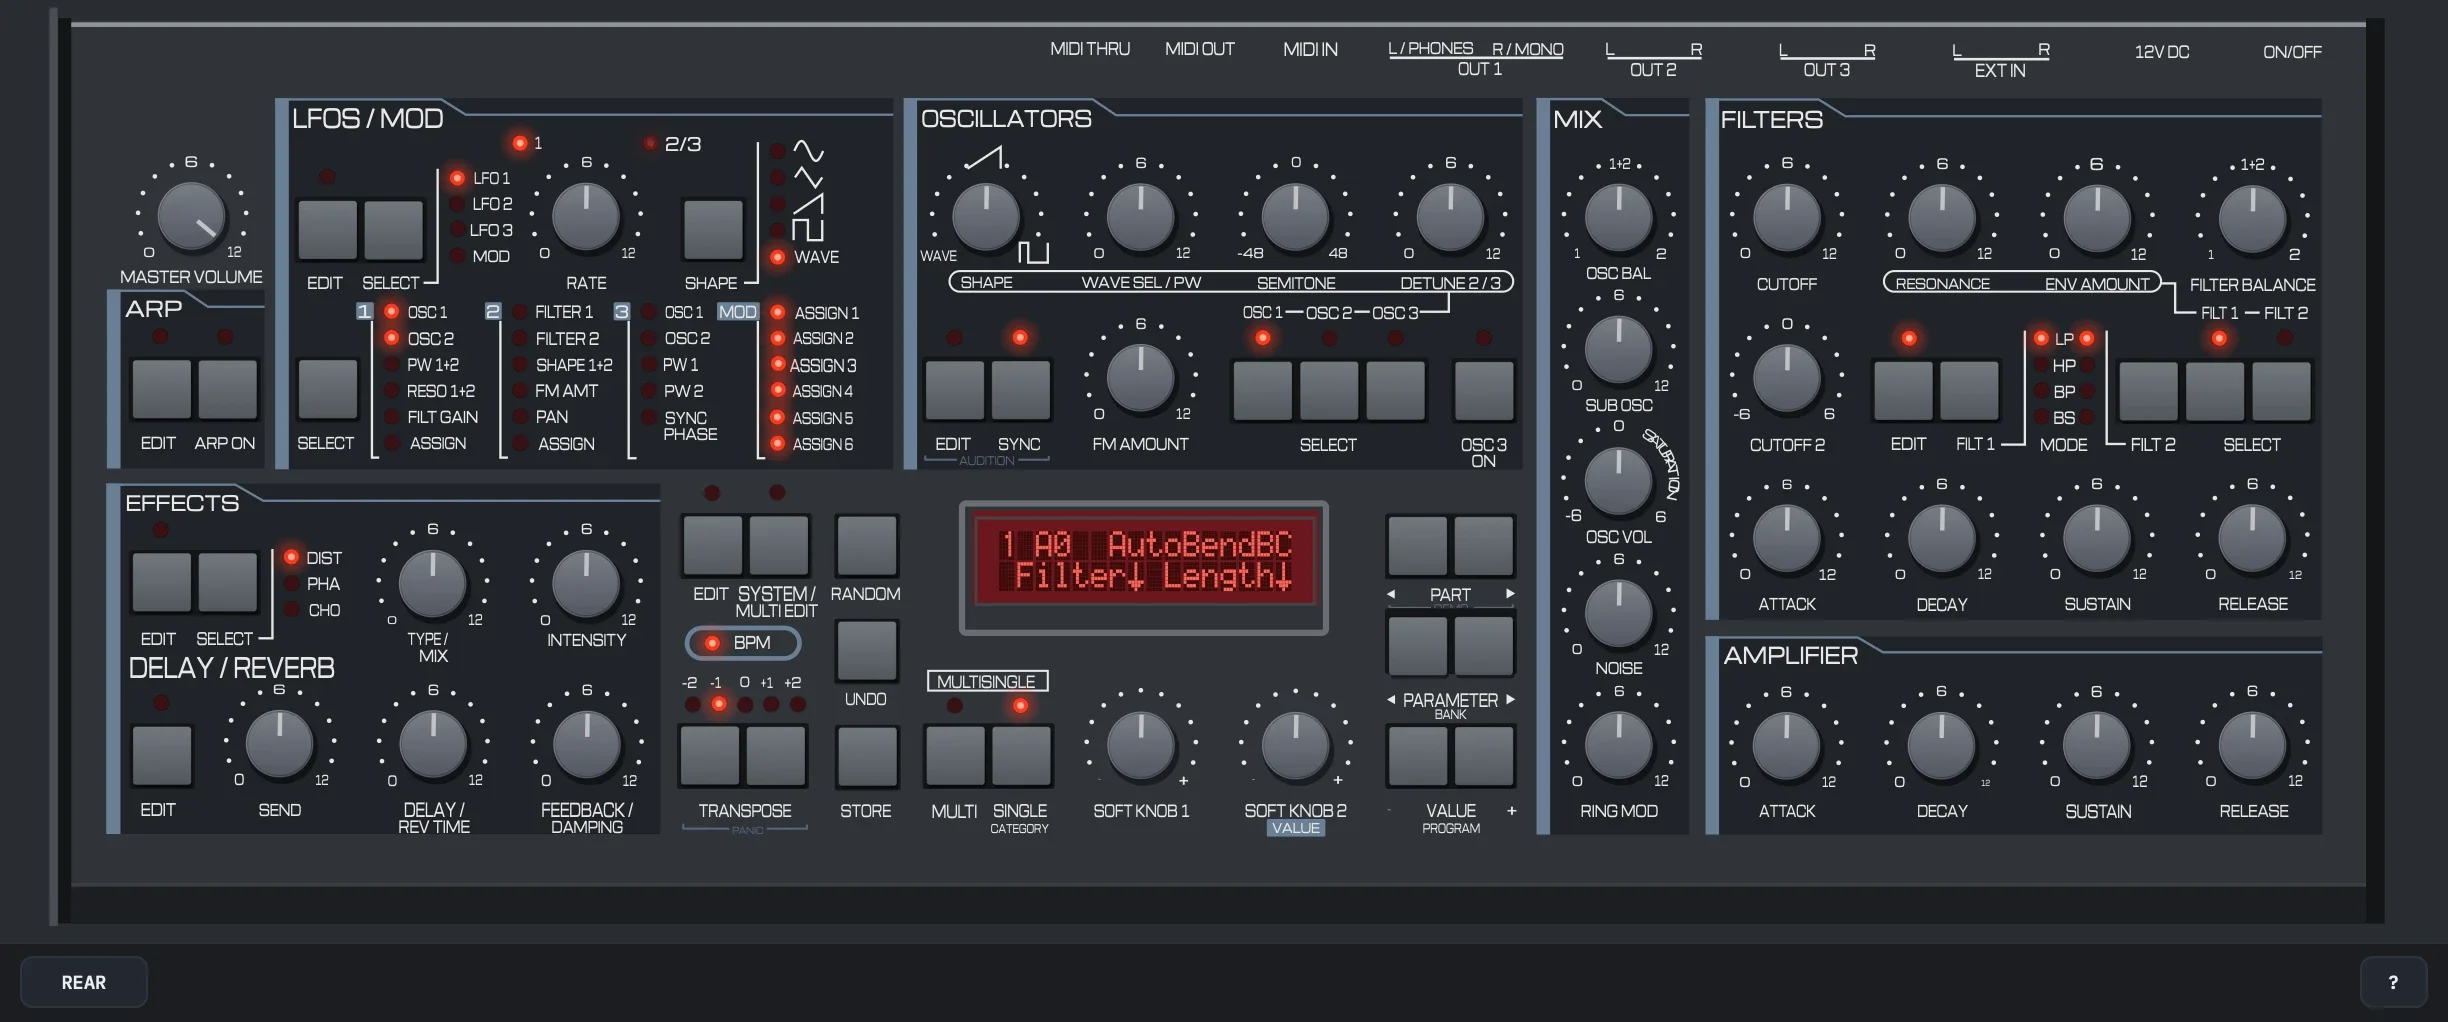
The three blank places take an SVG or PNG of your own each, named as below, anywhere in the ROM folder (how artwork files work). ROMs in the top bar lists them with what each has, opens the folder with Show its folder, and reads it again with Rescan.
| File | Place | Size |
|---|---|---|
| ac-digital-vc-maker.svg or .png | Access logo | 51.0 × 9.4 mm |
| ac-digital-vc-name.svg or .png | Virus wordmark | 73.4 × 8.0 mm |
| ac-digital-vc-tagline.svg or .png | The line under the panel's right side | 76.0 × 3.6 mm |
The plain names (maker.svg…) in artwork/virusc/ or artwork/virusc.zip work too, and win over these.
Your first sound
- Play a note on MIDI channel 1: a new instance plays A0 1.
- Where the display shows a program, PARAMETER/BANK 2 steps through the banks and VALUE/PROGRAM 3 through their programs. From a DAW, bank select (controller 32: 0 is bank A, 7 bank H) and a program change do the same.
- The knobs edit the program; the EDIT keys open their menus, as the manual describes.
The panel
It is the unit's, measured from photos: every key goes through the firmware's own key scan, every LED shows what the firmware lights, at the brightness it drives it, and the display shows the controller's dots.
Programs and memory
- Banks A and B are the battery-backed RAM, with the multis and the global settings. STORE 1 writes there, as on the unit. A new instance holds copies of banks C and D in them.
- Banks C to H are the flash: the factory programs. STORE can't write them; STORE TO FLASH can.
- The session keeps all of it: see Automation and sessions.
STORE TO FLASH
The SYSTEM menu's STORE TO FLASH copies bank A or B over a flash bank, as on the unit: "wait…", then "programming OK!" and a restart. The flash bank changes for this instance and its session; the ROM file on disk doesn't. State, Reset… puts the factory banks back.
Power-on keys
The unit reads its keys once as it starts. The plugin starts with none held, so the combination that clears the RAM can't be used: State, Reset… does the same.
The rear
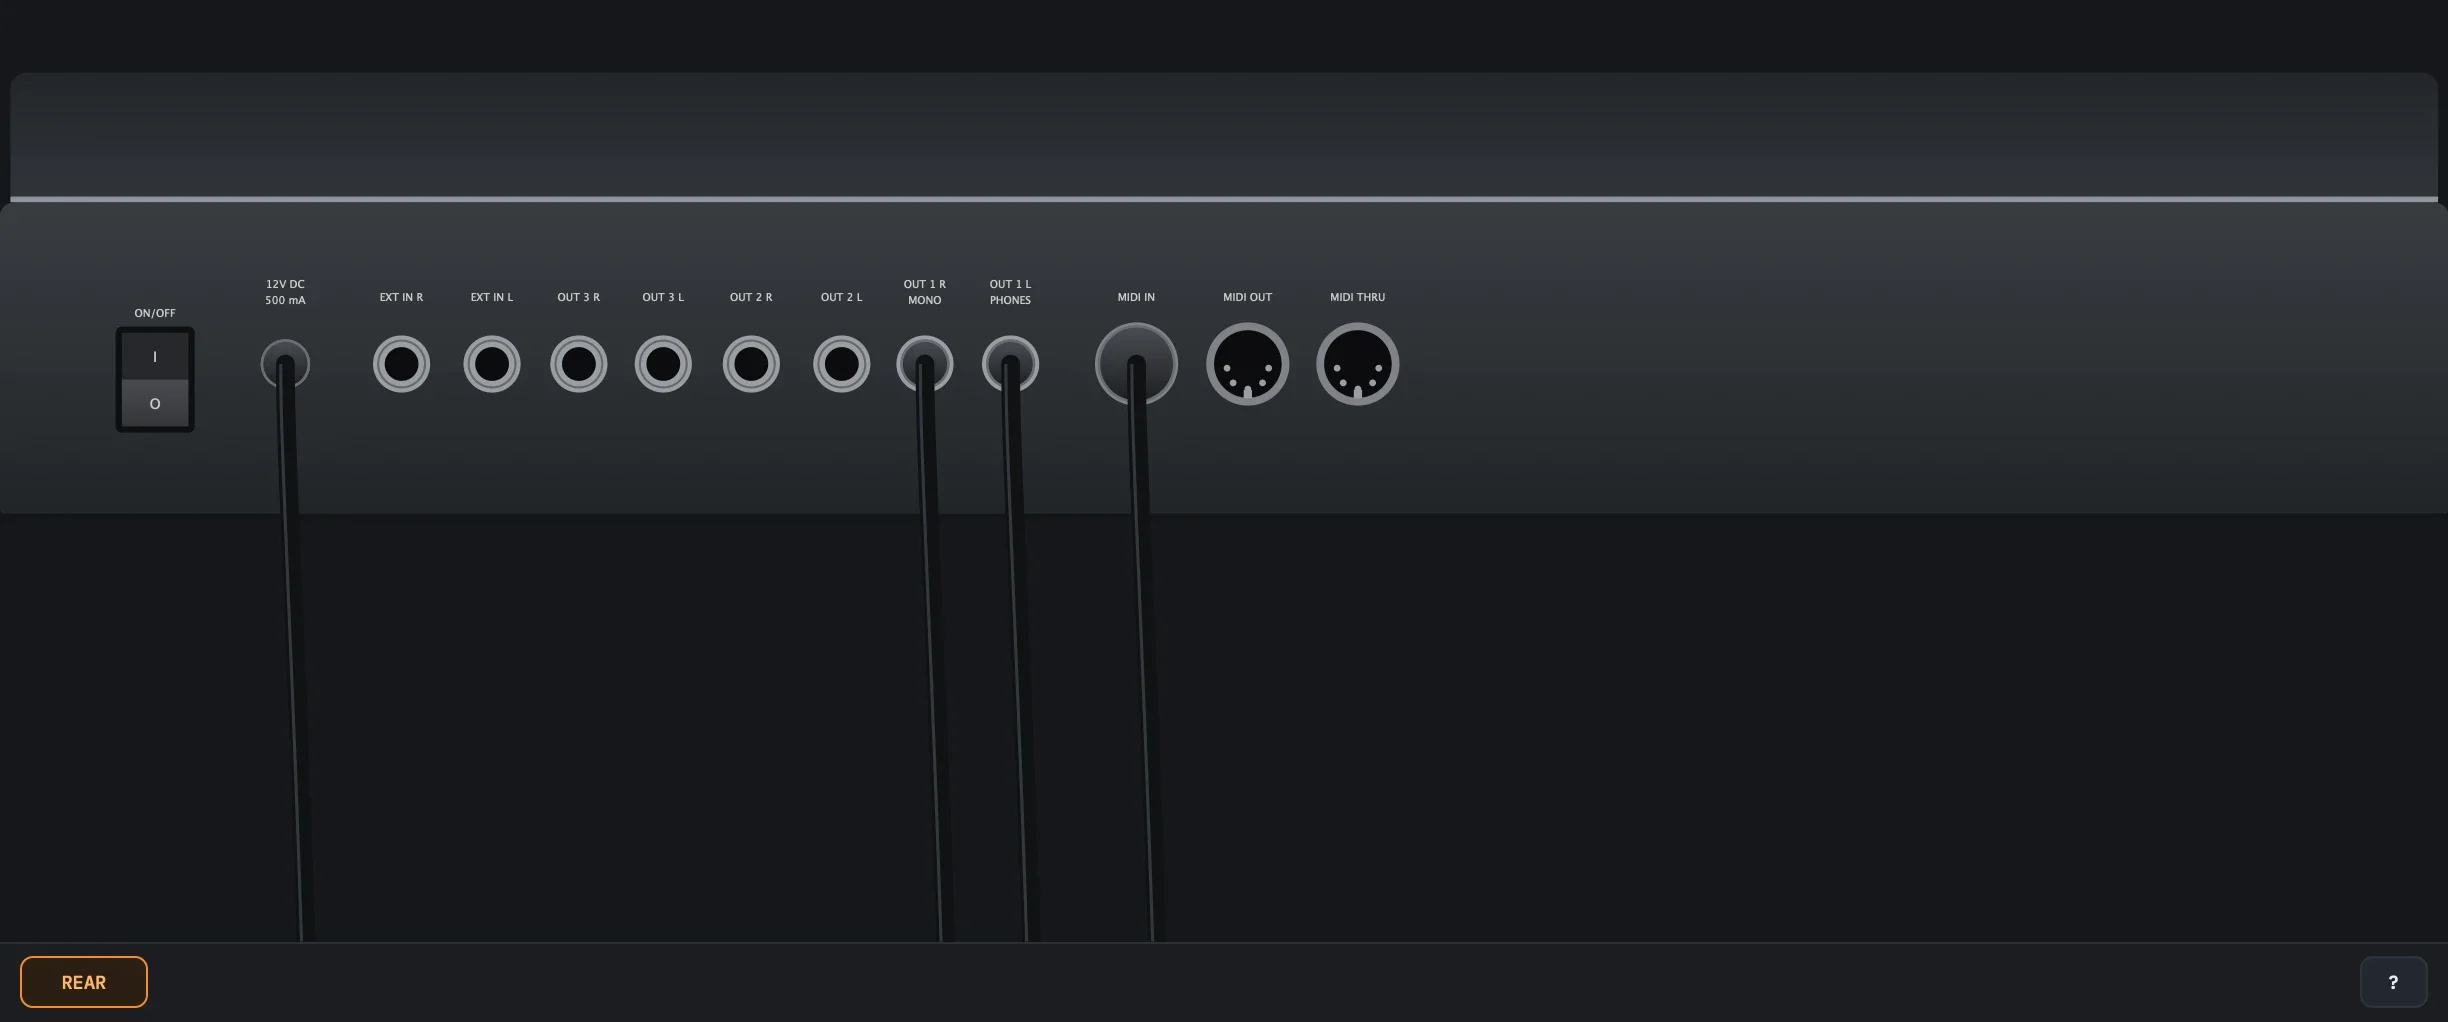
REAR in the bottom bar turns the unit round. Cables hang from the jacks in use.
OUT 1, 2 and 3
- OUT 1 3 is the plugin's main output.
- OUT 2 and OUT 3 are two more stereo outputs, off until the DAW turns them on (a mono bus gets the jack's left side). What reaches them is the firmware's routing: a part's OUTPUT SELECT in multi mode, and SECOND OUTPUT.
EXT IN
The two inputs 2 are the plugin's side-chain, read only while the DAW feeds it: for the vocoder, the INPUT modes and the input follower. Logic, Live, Cubase, Reaper, Bitwig and FL Studio (VST3) feed an instrument's side-chain; GarageBand doesn't. The standalone app has no inputs.
ON/OFF
The rocker 1 switches the unit off and on. Off, it's silent and dark, and its memory is kept; on, it boots from it, as the unit does. A new instance or a session load doesn't need it: the plugin starts on. MIDI IN, OUT and THRU 4 take no cable: MIDI comes from the DAW (MIDI and your DAW), and THRU isn't emulated.
The bars
The top bar
- BETA after the name: this version is a beta. About shows the version.
- ROMs: the ROM folder, the ROM and the artwork, with their full paths, and Show, Change… and Rescan for the folder.
- State: see State.
- About: the version, the ROM folder and artwork in use, the update check, and links to this guide, the site and the forum. A newer version shows as a button in the bar.
State
- Save to file… saves the instance: the knobs, the battery RAM (banks A and B, the multis, the global settings, the program being edited) and any flash bank STORE TO FLASH wrote.
- Load from file… loads one. The standalone app's Options menu saves and loads the same files.
- Reset… makes it a new instance: a fresh memory, the factory flash, every knob at its default.
The bottom bar
- REAR
- The rear panel: The rear.
- ?
- Shows the list of computer keys over the panel. Any click, ? or Escape closes it.
MIDI and your DAW
MIDI in
The DAW's MIDI goes to the firmware through the unit's MIDI IN, byte by byte at 31,250 baud, and it does with it what the unit does: notes, program changes and bank select, controllers, sysex (parameter changes, dumps), on the channels its SYSTEM menu and multi mode set. A new instance plays channel 1. The owner's manual lists the controllers and the sysex.
MIDI out
What the unit sends from MIDI OUT comes out of the plugin's MIDI output: knob moves as controllers, keys as sysex, and the SYSTEM menu's MIDI DUMP TX as single dumps. Route it to another track to record it, or back in to automate.
Automation and sessions
The 32 knobs can be automated, in this order: LFOs Rate, Effects Send, Master Volume, Osc Shape, Effects Delay Time, Effects Intensity, Effects Type Mix, Effects Feedback, Mix Osc Bal, Soft Knob 1, Soft Knob 2, Mix Sub Osc, Osc Wave, Osc Detune, Osc FM Amount, Osc Semitone, Amp Attack, Filters Attack, Filters Cutoff 2, Amp Decay, Mix Osc Vol, Filters Cutoff, Mix Noise, Mix Ring Mod, Filters Release, Filters Balance, Amp Sustain, Amp Release, Filters Decay, Filters Sustain, Filters Resonance, Filters Env Amount. Automating one turns the knob: the firmware reads it as it reads the real one. Everything else goes by MIDI.
A session saves the knobs, the battery RAM and any flash bank written, as State does; the instance boots from them when the session opens.
Idle, the DSP sleeps and the output is exact zeros, but the 80C515 keeps running: the display and LEDs carry on. A note, a knob or sound at the inputs wakes it. ac-digital-vc reports an 8 s tail.
Keyboard and mouse
Computer keys
Click the panel first.
| Keys | Panel |
|---|---|
| Left, Right | PARAMETER < > |
| Down, Up | VALUE − + |
| Page Down, Page Up | PART < > |
| Return | STORE |
| U | UNDO |
| E | EDIT |
| M, S | MULTI, SINGLE |
| ? | The key list |
| Escape | Closes the key list |
Some DAWs keep letter keys for themselves.
Mouse
- Knobs: drag up or down; shift is finer, double-click goes back to the start position.
- Keys are held while the button is.
- Window: drag the bottom-right corner, half to twice the size.